how to paint a garage floor
my step by step guide
Updated October 27, 2023
Author Micheal Day
These are the basic steps I use when I install an epoxy paint on a garage floor.
- Evaluate the floor - is it in good condition or does it need some repair
- Check for moisture problems
- Prep - Lightly grind or sand the concrete
- Repair any cracks or spalled areas
- Clean the concrete
- Apply primer coating of epoxy
- Apply colored coating or epoxy
- Apply clear top coat of polyurethane or uv resistant epoxy
For more in-depth information about each step watch the video and read more about them below.
All the supplies needed are listed at the bottom of the page.
Check out my Epoxy Floor Coating Course to learn even more
do you want to make your old concrete floor look brand new?
Adding an epoxy paint to your concrete floor can give it a unique, beautiful, brand new look! The best part about this is, you can do it all by yourself which will save you time and money!
Below, I have listed my step by step guide and supplies that I personally use to successfully epoxy paint a garage floor.
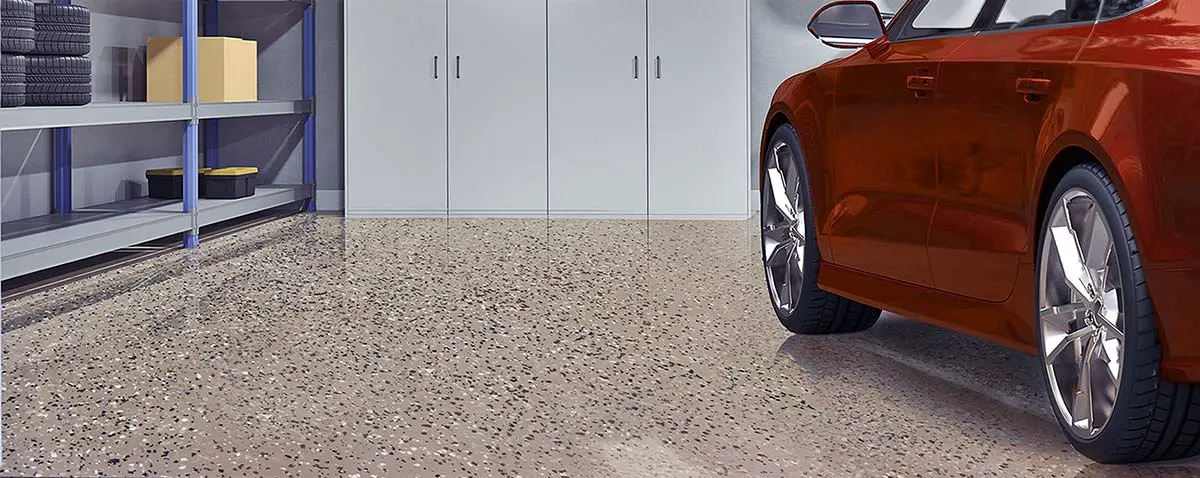
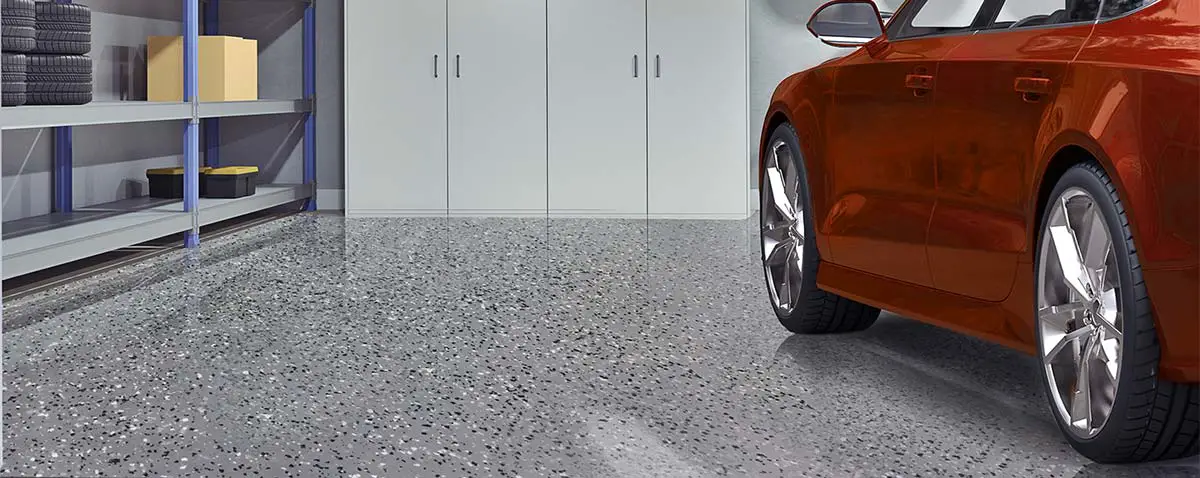
Just look at this before and after picture of a garage floor I applied an epoxy painted coating to:
 BEFORE BEFORE |
 AFTER AFTER |
here are the steps:
|
STEP 1. EVALUATE THE FLOOR - Is your concrete floor old or new? If it 's older concrete it may have some cracks, pitting, or spalled areas that need to be repaired first. Does it have a whitish powdery substance on the surface anywhere? This could mean you have moisture issues that need to be addressed before installing your epoxy paint. The above issues are what I see most often and I'll cover how to remedy them below. If your floor is newer and/or it has none of the above, you're in good shape and can skip the repair step. |
 |
|
STEP 2. CHECK FOR MOISTURE - Moisture vapor coming up through the concrete from the sub-grade below is fairly common. You may see a whitish powdery substance on the floor (efflorescence) that's a sure sign you have some kind of moisture issue. Even if you don't notice any moisture, it's important to check before moving forward. Moisture vapor transmission will cause blistering and peel off your new epoxy paint. And we don't want that!! To check for moisture, tape down an 18" x 18" piece of 4 mil plastic to your floor. Let it sit for 24 hours and peel it off. |
 |
If you notice any water, condensation, or darker concrete, you have some type of moisture issue and need to remediate it.

The most effective way to block moisture vapor from coming up through your concrete is with a Moisture Vapor Blocking Epoxy Primer.
That's what we use on our epoxy garage floor installations.
It soaks into the concrete blocking the pores and it primes the concrete for the epoxy coating.
Honestly, I like to use this even if I don't see any moisture. It 's cheap insurance to prevent future problems from occuring.

STEP 3. LIGHTLY GRIND OR SAND THE FLOOR - This is the best way to prepare and clean the concrete in advance of applying the epoxy paint.
You want to make sure the concrete doesn't have any dirt, paint, previous sealers, spills, stains, gum, or anything that may not allow the epoxy to adhere to the concrete.
In my opinion, acid etching the concrete to clean it/prep it isn't good enough. I've seen too many epoxy floors that homeowners applied themselves after acid etching that peeled off in less than a year.
The picture to the right is pretty typical as to what happens to epoxy paint when you only acid etch the floor.
Acid etching doesn't create a surface profile that's aggressive enough for epoxy to adhere to and last for years.
Plus it introduces water into the concrete which we already know is bad and could cause blistering.
 Floor that was acid etched only before applying epoxy paint
One way to lightly grind the surface of the concrete is with a hand held floor grinder and a diamond cup wheel. You'll see us doing this in the video above.
Another way is to use a Diamabrush on a floor buffer. I also show you that in the video. You can rent these at most rental stores.
You can see both of these methods in the video above.
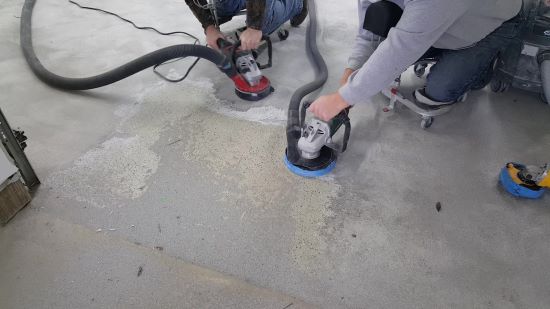 Hand grinding
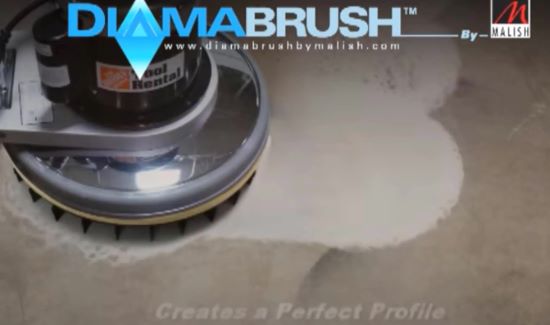 Diamabrush tool
When we prep our concrete floors using one of the methods above we rarely if ever have any problems with the epoxy paint peeling off the floor.
How do I fix a crack in my concrete floor?
STEP 4. FIXING CRACKS, PITTING, AND SPALLED AREAS - If you have to repair a crack or spalled area the easiest way is to use Crackweld.
It's a diy concrete repair material you can use for all of the above. We use it on our floors to quickly make repairs.
Check out my youtube video below to learn how you can fix a crack in your concrete floor:
|
Buy the DIY Crack Repair Kit I use here: Crackweld Floor Repair Kit 2 Pack The only other thing you'll need is a single tube caulking gun. This one will work fine. If we have a lot of cracks and spalled areas to repair, I will buy their 4 Pack or the PRO KIT instead. |

STEP 5. VACUUM AND MOP THE CONCRETE TO REMOVE DIRT AND DUST
After grinding, diamabrushing, and repairing your concrete, you have to clean the surface.
Give the floor a good vacuuming and then mop the floor with a micro-fiber mop and denatured alcohol.
The micro-fiber mop soaked with denatured alcohol will remove any fine particles the vacuum missed.
Wipe your hand on the floor after you vacuum it. If you feel any dust, this has to be removed.
The mop and Denatured alcohol works very good to remove the residual dust.
The d-alcohol evaporates very quickly and won't affect the epoxy.
Don't use water instead of the d-alcohol, you don't want any moisture in the concrete before you apply the epoxy paint.
 Micro-Fiber mop soaked in denatured alcohol
what paint should I use?
A lot of epoxy paint manufactures won't sell direct to diy'rs and the public because they want to make sure you're trained to use their epoxy.
But there are some good one's out there I found that'll sell directly to you. Here's one that sells the whole kit and you can get it on Amazon.
PRO TIP: I don't recommend using a latex or acrylic paint to coat your floor. These are not very durable and wear off pretty quickly. You'll be re-coating them every year to make them look new again.
|
I recommend using MPC-100 2 part epoxy garage floor coating products. They have a wide range of products that you can use to successfully complete your garage floor painting. Their product comes in 3 colors: tan, gray, and dark gray. (Shown below) Note: I would get twice as much as you need. If the kit says it will do a 2 car garage, then get 2 kits. The epoxy usually doesn't go as far as they say it does and you either run out or have to spread it too thin which causes uneven results. |
 |

STEP 6. APPLY THE PRIMER COATING - A lot of diy epoxy floor paint kits don't come with a primer coating. They want to sell you "simple" and skip this step.
This is a crucial step to insure your epoxy paint will not chip, flake, or peel off in my opinion.
Using a primer coating will help the epoxy coating adhere to the concrete much better and give you a better overall finished product.
If you have moisture present in your floor, then just use the MVB (moisture vapor blocker) epoxy as your primer.
If no moisture is present, you can use the primer below.
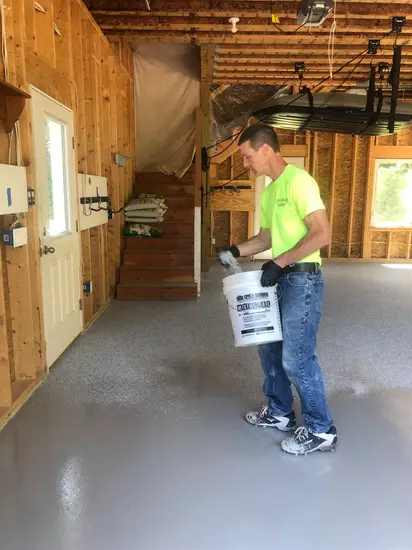
Mix the primer coating according to the instructions. Once mixed, cut in your edges with a brush and roll out the epoxy onto the floor.
Roll and back roll the material to make sure you have complete and even coverage.
1 kit will do between 200 and 500 square feet depending on the porosity of your concrete.
Always follow the manufactures guidelines when applying their epoxy paint.

At 70 degrees F. the primer coating will be dry in 4 - 6 hours and you can apply the colored epoxy coating at this time. Or you could wait until the next day to apply the colored epoxy coating.
STEP 7. APPLY THE COLORED COATING OF EPOXY PAINT
Mix the epoxy kit according to the manufactures specifications. Most kits are a 2:1 ratio, meaning you have 2 parts of base material (Part A) and 1 part of activator (Part B).
Or if it comes in a 3 gallon kit, you'll mix 2 gallons of the base material with 1 gallon of the activator material.
If you use a different epoxy floor paint, just make sure you mix the materials according to their instructions. The mixing is very important!! It has to be done right.

After the epoxy is mixed, dump it (or ribbon it out) all across the floor.
PRO TIP: If it's a big floor and I have more than 1 kit, I measure out the coverage area and mark it off with blue painters tape so I only use that 1 kit in that area and don't spread it too thin.
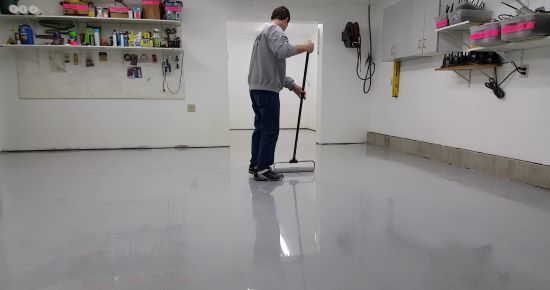
I like to squeegee the epoxy around to cover most of the area first, then I roll it with a 18" - 3/8 nap roller to even it out, and finally I back roll across the entire area for a final roll.
Note: All these steps are explained in more detail in my epoxy floor training course.
This coating will take 6 - 12 hours to dry, so let it set overnight before applying the top-coat.
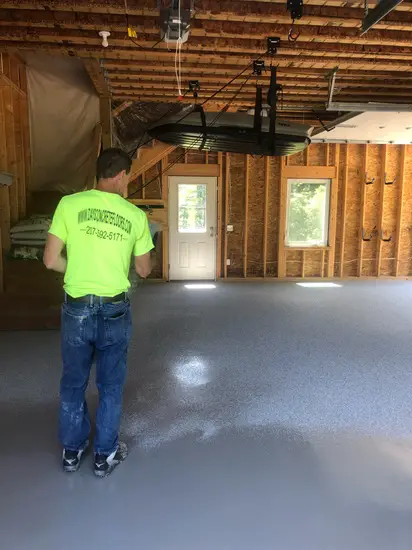
IF YOU ARE APPLYING COLOR FLAKES - As you apply the colored coating of epoxy paint, stop after every section and throw down the color flakes while the area is still wet. Sprinkle them on by hand, building the flakes up until you're satisfied with the coverage.
Work your way from back to front, as you roll on the epoxy, doing each section until the entire floor is coated. Allow to dry overnight in preparation for the top coat.
Here i am adding color flakes to this painted epoxy garage floor:
 |
 |
STEP 8. ROLL ON THE TOP COAT
You're going to want to roll on a top-coating to protect your epoxy. Epoxy will scratch and isn't very UV resistant so a top-coat will offer you extra protection and durability.
This is Deco-Crete Supply's polyaspartic clear top-coat. You roll it on the same as the colored coating.
Some other epoxy brands will use a polyurethane as the top-coat. That's a good top-coat also.
If the brand of epoxy you're looking at doesn't have a clear top-coating, then I wouldn't recommend using that brand.

APPLY THE CLEAR TOP COAT using the same method as the colored coating. Mix, squeegee, and roll it on the same way as the previous coating.
Make sure to measure out your coverage areas if you have more than 1 kit so you get uniform coverage throughout your entire floor.
IF YOU APPLIED COLOR FLAKES, you may need to lightly scrape or sand the floor to smooth the flakes.
We use a floor scraper to scrape our flake floors, just slide the scraper across the floor (kinda the same way you roll on the epoxy) making sure you scrape the entire floor.
I scrape the floor in two different directions, the first scrape may be North to South, and the second is East to West. That ensures there's no flakes sticking up out of the epoxy.
Then I vacuum up the flakes and I'm ready to top-coat.
PRO TIP: Don't worry if you're scratching the epoxy coating, the top coat will hide all/any scratches.
how much will this cost if i do it by myself?
By doing this yourself, it can save you a lot of money.
Hiring a PRO to install your epoxy floor could cost you $4 to $7 per square foot.
If you do it yourself, it might only cost you about $2 to $3 per square foot or less.
I offer online training on how to apply an epoxy floor coating, you can buy my course that will take you through the steps and ensure you the best results: Epoxy Floor Coating Course

HOW LONG SHOULD I WAIT BEFORE I CAN WALK ON MY NEWLY PAINTED EPOXY FLOOR?
Most epoxy paints cure for foot traffic in 24 hours, however I recommend that it would be better to wait 48 hours before you go ahead and walk on it.
HOW LONG SHOULD I WAIT UNTIL I PARK MY CAR ON MY NEWLY PAINTED EPOXY FLOOR?
Most epoxy paints take 7 days to fully cure. I tell my customers to wait a full 7 days before they park their car or truck in the garage. BUT... make sure you read the manufacturers specifications and follow their guidelines.
ALL THE SUPPLIES YOU WILL NEED:
For information on other related garage floor topics click on the links below.
EPOXY GARAGE FLOOR COATING PREPARATION
GARAGE FLOOR PAINT BEST VS WORST
Return from Paint Garage Floor to Garage Floor
Return from Paint Garage Floor to Everything About Concrete Home Page

Hi, I am Mike Day, owner of Day’s Concrete Floors, Inc. in Maine. I've been working with concrete for 40 years now, and this website is where I can share with you all the knowledge, wisdom and expertise I've gained from installing all kinds of stamped concrete, concrete floors, concrete overlays, concrete slabs and also repairing & fixing cracked or spalled concrete.
There’s a lot to cover, so if you have any questions, contact me!


LEARN HOW TO EPOXY A GARAGE FLOOR

FREE CONCRETE FINISHING TRAINING TUTORIAL VIDEO
Recent Articles
-
The tools I use to do concrete work - Use the same tools I do.
 Learn about and purchase the tools I use to do concrete floors, stamping, staining, polishing, countertops, sawing and a whole lot more.
 -
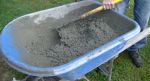
How To Make Concrete Without A Mixer - Mixing Concrete by Hand
 Learn how to make concrete manually without a mixer. Explore simple steps and tips to achieve the right consistency and strength for your construction project.
 -
What are the Correct Concrete Mixing Ratios - Ratio Chart
 The proper concrete mixing ratios are 1:2:3, 1:3:3, 1:2:4 for cement, sand, and stone. Mixing ratios are based on what psi concrete you need. Mixing ratio chart
 -
Concrete Mix Ratios For 3000, 3500, 4000, and 4500 psi concrete
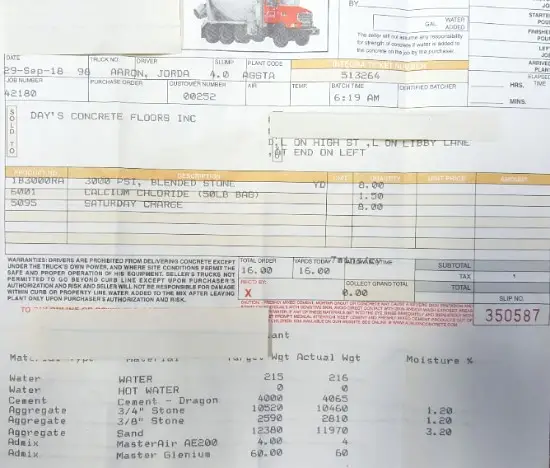 Learn the precise mix ratios for concrete strengths of 3000, 3500, and 4000 psi to ensure durability and stability in concrete construction.
 -
Don't get over charged! Here's my concrete slab cost for 2023
 I'm a concrete contractor that will tell you what a concrete slab will cost. These are my actual prices I charge for 2023 when I quote my customers.
