How To Paint Your Garage Floor With A 2-Part Epoxy
If you're thinking of painting your garage floor with a 2-part epoxy floor paint, I'm going to teach you how to do it.
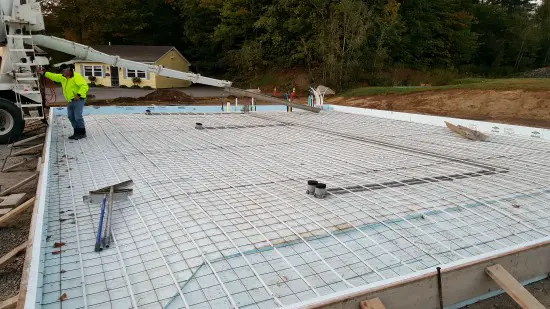
My company, Day's Concrete Floors, Inc. installs a lot of epoxy floor coatings throughout the year.
If you have enough knowledge and are willing to do the work, painting an epoxy coating onto your garage floor is something you can do yourself. You just have to know the correct way to do it.
If you'd like a more detailed, step by step process that will ensure you successfully complete the project, check out my Epoxy Floor Coating Course.
Below are the before and after pictures of a garage floor I installed a gray epoxy coating to.
The garage floor was in pretty rough shape, but with the right prep and a good epoxy floor kit, the floor came out looking very nice.
 BEFORE PIC
 AFTER PIC
The Basic Steps:
These are the basic steps you'll need to do to paint your garage floor with epoxy and make it last:
- PREP THE CONCRETE
- FIX ANY CRACKS OR SPALLING
- CLEAN THE FLOOR
- APPLY THE PRIMER COATING OF EPOXY PAINT
- APPLY THE COLORED COATING OF EPOXY PAINT
- APPLY THE CLEAR PROTECTIVE TOP COATING
I made a complete video course that teaches you all you need to know.
I show you all my tips and best practices for installing a garage floor epoxy coating in this course.
After taking this course, you'll know everything you need to know about how to successfully paint your garage floor with a 2-part epoxy coating.
Step 1: Prep your concrete floor
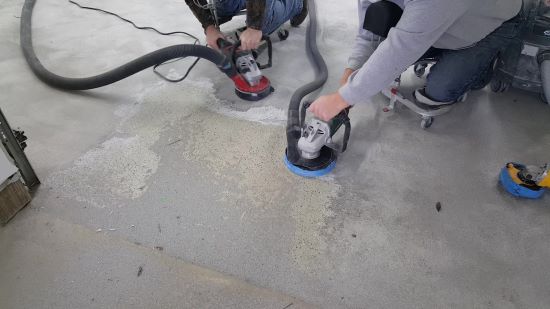
The best way to prep the concrete floor for your epoxy coating is to lightly grind the concrete.
Lightly grinding the concrete will help clean and profile the concrete all at once. It'll also remove any concrete sealers that may have been previously applied.
It's really not to hard to do. A dewalt grinder with a vacuum shroud and a good vacuum with a dust buddy will make it a dust free process.
PRO TIP: The correct "profile" on the concrete floor for best adhesion is like the feel of 60 grit sandpaper. You will not achieve this profile by acid etching the concrete. Grinding the concrete is the best way for you to do this.
Any garage floor epoxy kits that say just "acid etch" you concrete to prep it, put back on the shelf. I don't recommend these unless you grind the concrete.
TOOLS YOU'LL NEED:
Note: Some or all of these links on this page are affiliate links, which means if you click on them and purchase a product within 24 hours, I will make a small commission. Thank you for your support of this site!!
Step 2: Fix any cracks and spalling
The next step is to fix any floor cracks, chips, divots, or spalling.
If you don't have any of these issues, great! move to the next step.
If you have some cracks to fix, I use a couple crack repair products to do this with.
Make sure you vacuum the floor before fixing any cracks to remove any dust or dirt in the crack.
METHOD 1: If it's just some minor hairline cracks or some small chipped areas, then I'll just use some Bondo. Yup the stuff to fix car dents with. It can be used on concrete also.
Mix up a small batch on a piece of cardboard or a paper plate and use a puddy knife to force it into the crack or fill the small chipped area or small holes.
Bondo dries in about 20 minutes to you can lightly sand or grind it smooth.
METHOD 2: If you have more extensive cracking or damage due to spalling, I use a product called CRACKWELD DIY CONCRETE CRACK REPAIR.
This is a 2-part polyurea crack repair product that's really easy to use. You just use a caulking gun and put the Crackweld tube into it.
Then squeeze out the repair material into the crack or spalled area. Some silica sand comes with the kit if you need to sprinkle some sand into the crack (for wider cracks)
TOOLS AND PRODUCTS YOU'LL NEED:
- BONDO
- CRACKWELD CRACK REPAIR KIT
- CAULKING GUN
- PUDDY KNIFE
- SAME DEWALT GRINDER AS ABOVE
I'll show you how to fix cracks in concrete floors below.
Step 3: Clean the floor
 Vacuum Vacuum |
 Micro-fiber mop Micro-fiber mop |
After you've fixed all the cracks and damaged areas, it's now time to clean the concrete floor.
You want to remove any dirt and dust left behind by the grinding process.
Use a really good vacuum that has good suction. Take your time! This step is really important.
After you vacuum the floor, I recommend wiping the floor down with a micro-fiber mop. Wet the mop with some denatured alcohol. The damp mop will collect any residual dust and really clean the floor.
PRO TIP: Only use denatured alcohol for this process, it evaporates very quickly and will not affect the epoxy. Using water could lead to problems with the epoxy blistering later on.
TOOLS AND PRODUCTS YOU'LL NEED:
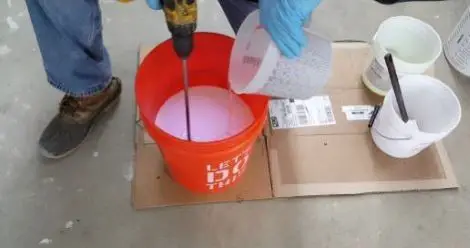
Step 4: Mix and apply primer coating
 |
 |
You're now ready to apply the primer coating of epoxy paint.
The purpose of most primer coatings is for part of the primer to soak into and fill the pores of the concrete.
When epoxy settles down into the pores of the concrete, it pushes out the air in those pores.
The air that's being forced out of the pores can cause tiny bubbles in your epoxy.
You don't want tiny air bubbles in your finished coating of epoxy paint so make sure you use a primer.
The primer will also provide a great surface for your colored coating of epoxy to adhere to.
Some primer's are also used to help block any moisture vapor from coming up through the concrete floor.
The primer I use in my course is like this. If you have moisture coming up through your floor, the pressure of the moisture will eventually cause your epoxy to blister, flake, or peel off.
Using a moisture blocking primer will greatly mitigate and stop this from happening.
MIXING THE PRIMER: Most 2- part Primer epoxy's are either mixed at a 1:1 or 2:1 ratio.
Just follow the manufacture's mixing procedure on your kit.
TOOLS YOU'LL NEED:
- Drill
- Mixing paddle
- Measuring bucket
- Clock or Timer
- 18" - 3/8 nap roller cover
- 18" paint roller with handle
- Edge brush for doing the edges
- Epoxy spiked shoes
APPLYING THE PRIMER: I use an 18" paint roller that's 3/8" nap to roll on the primer.
The thickness you apply the primer will vary depending on who's you're using.
The one I use goes on at 200 square feet a gallon. I measure out sections of the floor at 200 sf apiece and mark it off with painter's tape.
You want to be accurate at how thick you apply the primer for best results.
Get it all rolled out moving the roller "north and south" then finish rolling by back rolling it "east to west".
This ensures a nice even coat of primer on the floor.
PRO TIP: I mix up 1 gallon or 2 gallons at a time then dump it completely out onto the floor before I start rolling it.
As soon as you mix the 2-parts of the epoxy together, it dries fairly fast if you leave it in the bucket. Dumping it out on the floor gives you a lot more time to work with it.
Check on the technical data sheets to see how much "pot life" your epoxy has. This tells you how long you can leave it in the bucket.
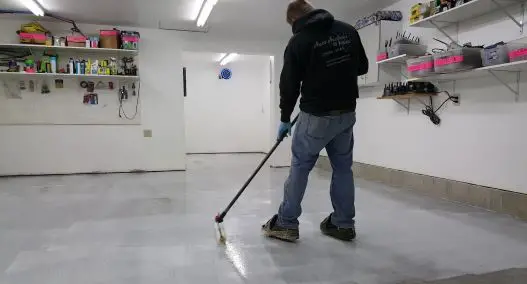
Step 5: Apply your colored epoxy
 Mix Part A with Part B Mix Part A with Part B |
 Mix with drill and paddle Mix with drill and paddle |
 Roll out the epoxy paint
After the primer coating is dry, you can paint on the colored coating of epoxy.
Usually this will be the next day, but it could be the same day if your epoxy dries fairly fast.
The colored epoxy is usually a 2-part system with a Part A and a Part B.
It could be a 1:1 or 2:1 ratio of part A to part B depending on who's epoxy you're using.
Just follow your epoxy kit's mixing instructions, this part has to be done right.
The colored coating may go on a little thicker than the primer coat. The one I use does. But not all of them do.
I apply the one I use at 100 square feet a gallon, so twice as thick as the primer coating. That's a pretty standard thickness. If the one you're looking at is thinner, you may want to look for another brand.
PRO TIP: If you had any bubbles in the primer coat that didn't "pop" and fill in, now is the time to address them before you roll on the colored coat.
Just mix up a little Bondo and fill these areas. Let the Bondo dry, lightly sand it and wipe it with denatured alcohol and your micro-fiber mop to clean the dust.
If you try to just coat over these areas without patching them you could end up with a bubble in your finished coat of epoxy.
APPLICATION METHOD: Dump your epoxy onto the floor in the sections you have measured out.
Ribbon it out as even as you can in each section.
Using an 18" roller, roll the epoxy "north to south" spreading it as even as you can and completely covering the floor.
For the final finish pass, immediately after you have rolled it and spread it north to south, walk back in and roll it "east to west" in one even pass.
Start on one side and slowly roll it until you get to the other side. Set the roller over 18" and go back the other way until you've rolled the entire section.
MY COURSE TEACHES YOU EXACTLY HOW TO DO THIS!!
TOOLS YOU'LL NEED:
- Drill and mixing paddle
- Measuring bucket
- Clock or Timer
- 18" - 3/8 nap roller cover
- 18" paint roller with handle
- Edge brush
- 4" Edge roller (optional)
- Squeegee to spread epoxy before rolling (optional)
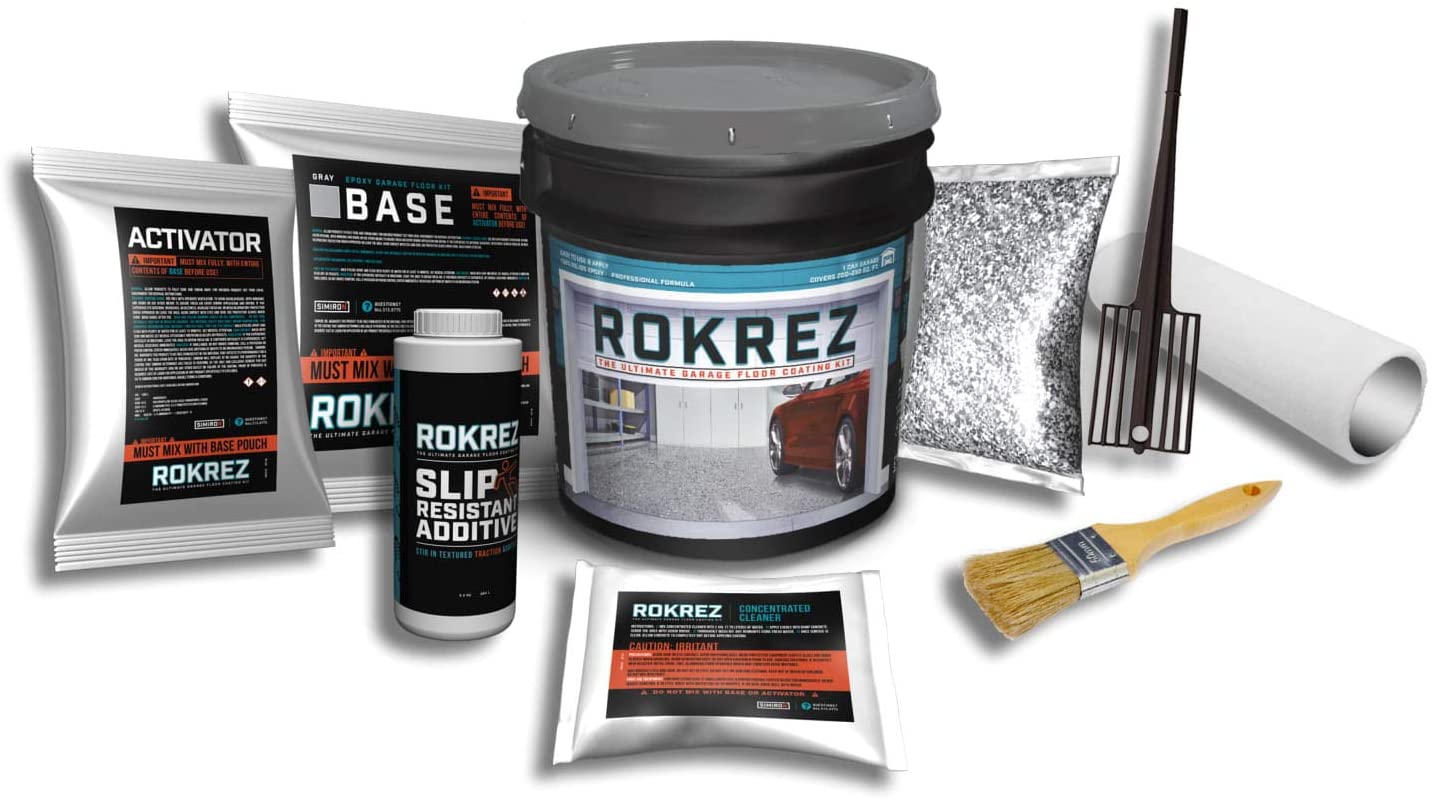
Epoxy Paint i recommend
|
I recommend using the RokRez Garage Floor Coating Kit. It comes with the products you need and in an assortment of colors. You can buy this on amazon by clicking here. PRO TIP: I suggest buying twice as much epoxy as RokRez recommends. You don't want to run out or try to stretch the product too thin. |
 |
Step 6: Apply the protective top coat
 Roll on the protective clear top-coat
Most of the better epoxy coating kits will have a clear protective top coating of urethane.
Epoxy scratches quite easily but urethane (polyurethane) is much more scratch resistant. (and chemical resistant)
It rolls on very thin but offers a lot of protection and prolongs the life and look of your epoxy floor.
Most urethanes mix at a 1:1 ratio and go on at a rate of 300 - 500 square feet a gallon.
If the epoxy kit you're looking at doesn't offer a clear protective top coat, I would look elsewhere.
Mix your urethane according to the instructions.
Most of the ones I have used, you can dip and roll onto the floor.
Leave the urethane in the bucket, dump some into a paint tray (I use a 18" paint tray and roller) then dip the roller in the tray and roll it onto the floor.
NOTE: Always follow your manufacture's application methods, it may be different than mine.
I roll a section north to south again then finish with the east to west finish pass. This helps eliminate stop and start marks from the roller.
TOOLS YOU'LL NEED:
- Dill and mixing paddle
- Measuring bucket
- Clock or Timer
- 18" paint roller cover
- 18" paint roller
- 18" paint tray
- Edge brush
- 4" paint roller (optional)
MORE TIPS:
For more information about repairing cracks, see fixing cracks in concrete floors to learn more about how to do this.
See concrete moisture problems to help you understand this. Moisture is your worst enemy when it comes to applying epoxy floor paint.
Check to see if your floor already has a concrete sealer on it by putting some water on the surface. If it beads up, the sealer will have to be removed before any paint goes down. Grinding it off is the best way to remove it.
After the floor is cleaned and ready for painting, choose a nice dry day between 50 - 80 degrees. Make sure the concrete is completely dry, no damp spots from a previous nights rain.
Some epoxy paints start to dry quite fast, especially if you leave it in the bucket, make sure you read the instructions, it's very important.
You may have to dump the epoxy on the floor in small areas and spread it out with a roller. Plan out in advance where you will begin and end for best results.
Read the manufactures instructions for drying time between coats, be patient and don't hurry we want complete success here.
Wear protective clothing, you will get some on you!!
OPTIONAL TOOLS & SUPPLIES YOU'LL NEED:
- ROLL OF PLASTIC & PAINTERS TAPE - For covering anything you don't want to get epoxy paint on.
- RUBBER GLOVES - To use while your applying the epoxy
In conclusion:
I do think installing you own epoxy floor paint is something you can do.
Especially if you follow my tutorial. I would highly recommend buying my course and learning from that.
I teach you all my tips and application methods in the video course, there so much more information in the course than what's on this page.
It would be a very good investment and give you the confidence about how to prep the floor and install the epoxy paint the right way.
Check the manufactures specifications for drying times they may vary greatly, some are much shorter.
Click on GARAGE FLOOR COATINGS for other painting concrete floor ideas.
For more information on concrete floor related topics click on the links below.
What is a CONCRETE FLOOR COVERING?
Is CONCRETE FLOOR HEATING easy to install?
What is the best CONCRETE FLOOR SEALER?
What is CONCRETE FLOOR STAIN?
What do I need to know about PAINTING CONCRETE_FLOORS?
Return from Painting Concrete Floor to Concrete Floors
Return from Painting Concrete Floor to Everything About Concrete Home Page

Hi, I am Mike Day, owner of Day’s Concrete Floors, Inc. in Maine. I've been working with concrete for 40 years now, and this website is where I can share with you all the knowledge, wisdom and expertise I've gained from installing all kinds of stamped concrete, concrete floors, concrete overlays, concrete slabs and also repairing & fixing cracked or spalled concrete.
There’s a lot to cover, so if you have any questions, contact me!

LEARN HOW TO EPOXY A GARAGE FLOOR

FREE CONCRETE FINISHING TRAINING TUTORIAL VIDEO
Recent Articles
-
Don't get over charged! Here's my concrete slab cost for 2024
 I'm a concrete contractor that will tell you how much a concrete slab will cost. These are my actual prices I charge for 2024 when I quote my customers.
 -
The tools I use to do concrete work - Use the same tools I do.
 Learn about and purchase the tools I use to do concrete floors, stamping, staining, polishing, countertops, sawing and a whole lot more.
 -
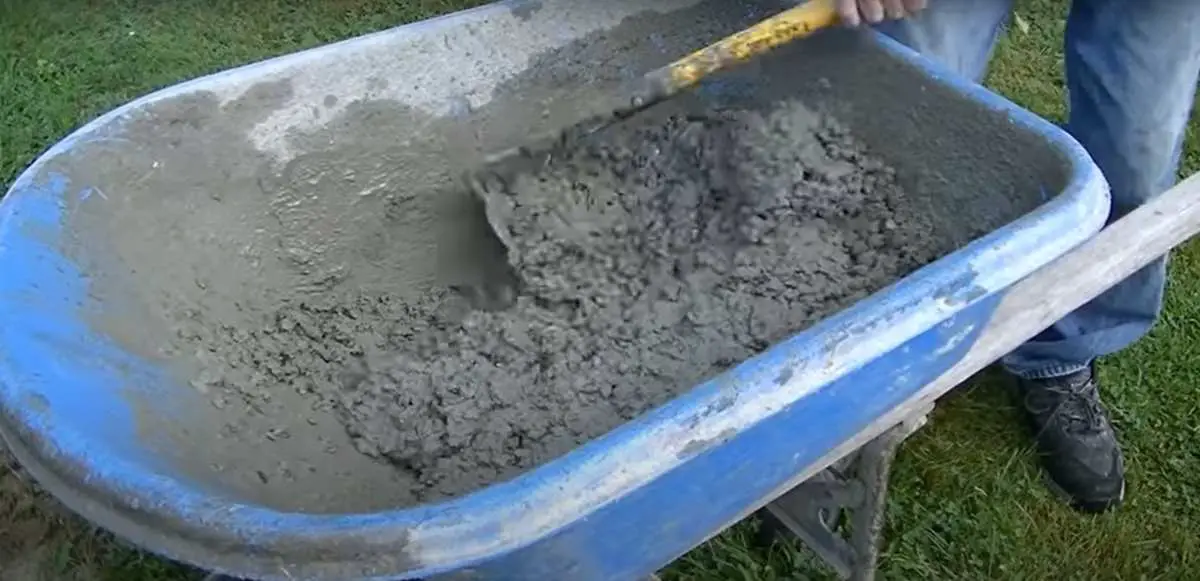
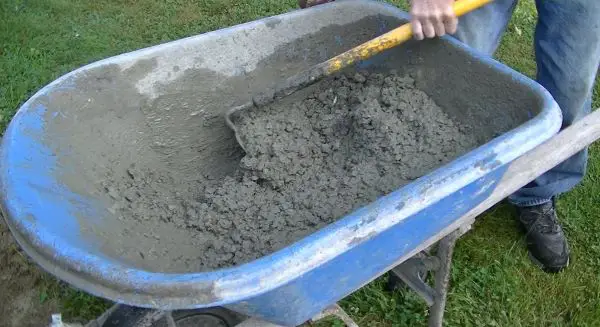
How To Make Concrete Without A Mixer - Mixing Concrete by Hand
 Learn how to make concrete manually without a mixer. Explore simple steps and tips to achieve the right consistency and strength for your construction project.
 -
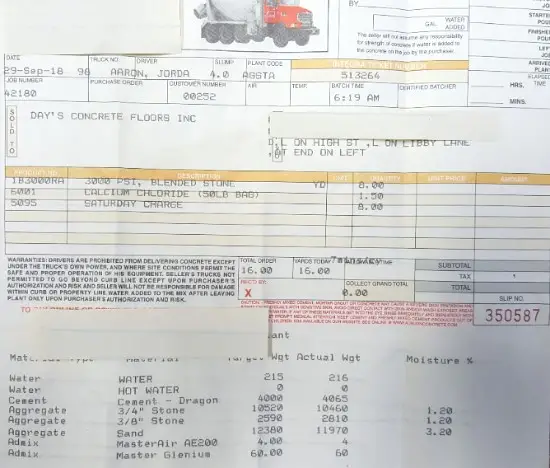
What are the Correct Concrete Mixing Ratios - Ratio Chart
 The proper concrete mixing ratios are 1:2:3, 1:3:3, 1:2:4 for cement, sand, and stone. Mixing ratios are based on what psi concrete you need. Mixing ratio chart
 -
Concrete Mix Ratios For 3000, 3500, 4000, and 4500 psi concrete
 Learn the precise mix ratios for concrete strengths of 3000, 3500, and 4000 psi to ensure durability and stability in concrete construction.