HOW TO STAMP CONCRETE
Here's the basic steps for how to stamp concrete:
- Prepare your sub-grade
- Install your forms
- Install your reinforcement
- Pour the concrete
- Stamp the concrete
- Saw cut expansion joints
- Clean and Wash the concrete
- Apply concrete sealer
In the video above, you can watch us pour and stamp the concrete for this 50' x 12' concrete patio.
Watching us stamp the concrete will show you part of the whole process.
It usually takes us 4 days to complete a stamped concrete job like this one.
Day 1. - Build the forms, set them to grade, install wire mesh or rebar
Day 2. - Pour and Stamp the concrete
Day 3. - Saw expansion joints and Wash & Clean the concrete
Day 4. - Apply the stamped concrete sealer
Step 1. Prepare the sub-grade
All stamped concrete, whether it's a driveway, patio, pool deck, or walkway needs a good gravel sub-grade to support the concrete.
Depending on what kind of stamped concrete project you're doing will determine how much gravel you need for a sub-base.
Another factor will be where you live. If you live in an area like I do, Maine, that has many freeze/thaw cycles in the winter, then your sub-base will be much deeper than if you live in Florida.
Here's the basics when it comes to the sub-grade:
Dig out any loom, clay, sod, sand (anything that's not gravel). How deep will depend on where you live.
In Maine I tell my customers to dig out at least 2 feet and re-fill with 3/4 inch crushed gravel. If they have mostly clay, I tell them we will be installing styrofoam under the slab to help protect against frost getting under it and heaving it.
If you don't have the severe weather we do or you don't have winters, you don't have to go as deep with the gravel. Use your discretion, ask an excavation contractor or hire one to prepare the gravel for you.
Make the gravel pad a foot wider than your stamped concrete pad will be to better support the edges.
Make sure your landscape slopes away from the stamped concrete so rain water doesn't wash away the sub-base.
Have some type of drainage around the perimeter if your landscape can't shed water for any reason.
Step 2. Install your forms
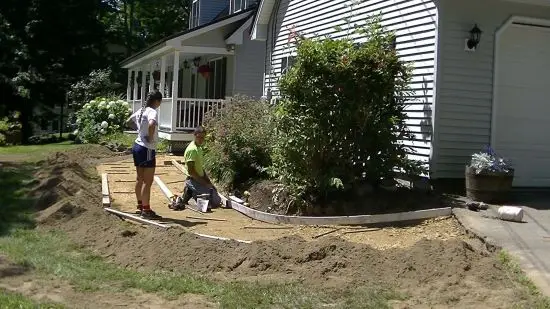
There's usually always some type of forming to do when you're installing stamped concrete.
Getting the forms in place with stakes to hold them and setting them to grade using a self-leveling laser is how I do it.
My straight forms are either 2x4's or 2x6's and my curved forms are Azek pvc trim boards like the picture above.
Securing the forms to the stakes with deck screws works best for me.
Make sure you use enough stakes to firmly hold the forms in place and back-fill the forms with any excess gravel you have to keep them from moving during the pour.
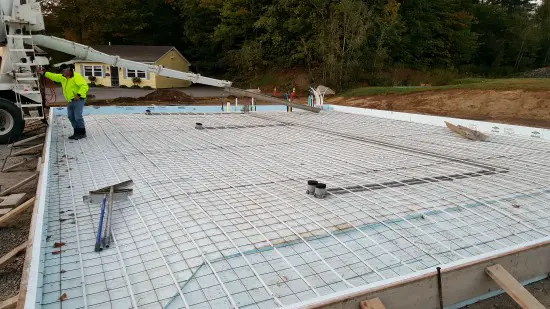
Step 3. Install reinforcement
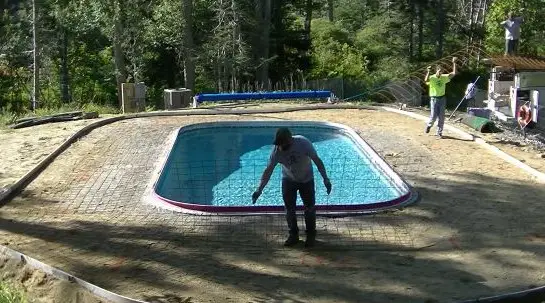
I will use a combination of wire mesh and fiber-mesh or a mat of rebar and fiber-mesh as my reinforcement.
The reinforcement (if in the middle of the concrete) will help keep any cracks that may develop "tight" and not open up to a wide crack.
REMEMBER: The most important part of the "prep" work is a well compacted sub-base. If your sub-base settles, no wire or rebar will keep it from eventually cracking.
Step 4. Pouring the concrete

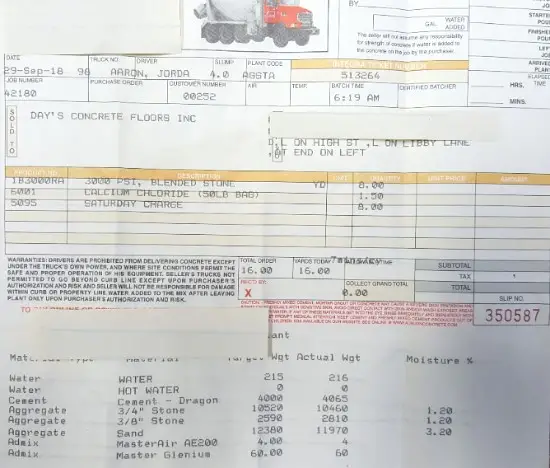
For my concrete mix, I always use a 4000 psi 3/8 pea-stone mix with fiber-mesh added to it.
The smaller aggregate in this mix is easier to pour and stamp.
I take my color to the concrete plant either that morning or the day before and they add it to concrete truck when the concrete gets batched out.
I buy my integral color from Marshalltown.com and they ship it right to my house. (use my promo code EAC to save 10% off any color you buy from them).
When the truck shows up on the job, I tell the driver to mix up the concrete to between a 5 and 6 slump.
This mix is not too wet and not too dry, it's a good workable slump that I like to use for pouring my concrete.
Mag float your edges and screed off your forms to level your concrete. Bull float your screeded concrete to smooth it continue this process until you're finished filling your forms.
Step 5. Stamping the concrete

After the concrete is poured it has to "set up" enough to support the stamps and your weight.
The timing of this varies on every project and is very dependent on how hot or cold the temperature is, how wet or dry you poured the concrete, if it's in the sun or shade, and if it's windy or not.
My rule of thumb is; start the finishing process when you can only press into the surface of the concrete about 1/4 to 3/8 of an inch with your fingers.
This ensures the concrete is soft enough to mag float, edge, and get a good stamp impression.
And not too soft (or you'll get low spots from your foot weight) and not too hard (or it'll be hard to get good texture from the stamps)
My STAMPED CONCRETE COURSE will teach you all you need to know about how to stamp concrete. Especially when to start, probably the most important part of the process.
After you've mag floated the surface and edged the concrete, start throwing on the release powder (like we do in the video above).
Then lay your first stamp, then the second, third, forth and so on.
Get all the stamps set in place, then start tamping the first one. Pick it up and check for good texture, if it's good re-set it in front of the last stamp you set down.
Continue this process until you've stamped the entire surface.
Step 6. Controlling Random Cracks

The next day after stamping I will saw cut my expansion joints.
You can use a regular electric circular saw with a diamond blade and a 2x4 for a straight edge to keep the cuts straight.
On a 4" thick pour, I like to cut 1 1/2" deep. I like to make my cuts 6', 8', or 10' apart depending on how wide my project is.
The walkway above is about 4' wide so I made my cuts about every 6'.
This distance is close enough to control any random cracks.
REMEMBER: Concrete cracks when it dries/cures. It will crack somewhere, either in a saw cut or where it wants to if you don't saw cut.
Saw cutting usually controls most cracks but one of some may still develop over time. It's just the nature of the beast.
Step 7. Wash and Clean

After you've sawed your expansion joints, it's time to wash and clean the stamped concrete.
You have to remove all the loose release powder so you're concrete sealer will adhere properly.
The best way to clean the concrete is with a pressure washer, scrub brush, and dawn dish detergent.
Start by using a push broom and broom off most of the excess release powder.
Then using your pressure washer (or hose if you don't have one) rinse off the remaining loose release powder.
Mix some dawn dish detergent and water in a 5 gallon bucket.
After you've rinsed the loose stuff off, dump on the soapy mixture and scrub it into the surface.
The dawn detergent and brushing action will remove any remaining loose release powder.
Rinse after scrubbing (twice is what I do) and you're concrete will be clean.
Make sure to tell everyone NOT to walk on it until you get it sealed. You don't want to have to clean it again.
Let it dry for at least 24 hours before coming back to seal it.
Step 8. Seal it

After 24 hours have passed, with no rain in between, you can seal your stamped concrete.
I like to use Foundation Armor AR350 for my stamped concrete sealer.
I also like to use this Stainless Steel Chapin sprayer to apply the sealer with.
I will bring a leaf blower with me and quickly blow off any dust, leaves, or bugs that may have got on the concrete first.
Then I fill my sprayer, pump it up, and apply a very light coat of sealer to the concrete. I shoot for about 300 - 400 square feet per gallon on my first coat.
You don't want to apply it thick and you don't want any puddles. If you get a puddle just wipe it with a rag to thin that area.
Let the sealer dry for 30 to 40 minutes or until it's tack free and dry to touch, then apply your second coat at 300 - 400 square feet per gallon.
Let it dry and that's it, YOU'RE DONE!
Stay off it for 24 hours before any normal use.

If you want to learn how to stamp concrete I'll walk you through it step by step.
My stamped concrete course teaches you all the necessary steps you need to take to stamp your own concrete.
The course shows you where to buy your color and release powder.
It shows you where to get your concrete stamps and touch-up tools.
It teaches you Steps 2 - 8 above, best of all you get me as your teacher.
It teaches you when to start the finishing process of mag floating and edging the concrete.
I show you how to apply the sealer and how to maintain your stamped concrete.
You get to watch and learn from us on REAL stamped concrete projects.
I am continually adding lessons to the course to help you keep learning more and be more confident doing your own projects.
You get to comment and ask me questions to help you get better results.
Check out the video below to see some of the things you will learn in this course.
For more information about stamping concrete check out these pages:
Return from How To Stamp Concrete to Stamped Concrete
Return from How To Stamp Concrete to Everything About Concrete Home Page

Hi, I am Mike Day, owner of Day’s Concrete Floors, Inc. in Maine. I've been working with concrete for 40 years now, and this website is where I can share with you all the knowledge, wisdom and expertise I've gained from installing all kinds of stamped concrete, concrete floors, concrete overlays, concrete slabs and also repairing & fixing cracked or spalled concrete.
There’s a lot to cover, so if you have any questions, contact me!


LEARN HOW TO EPOXY A GARAGE FLOOR

FREE CONCRETE FINISHING TRAINING TUTORIAL VIDEO
Recent Articles
-
Don't get over charged! Here's my concrete slab cost for 2024
 I'm a concrete contractor that will tell you how much a concrete slab will cost. These are my actual prices I charge for 2024 when I quote my customers.
 -
The tools I use to do concrete work - Use the same tools I do.
 Learn about and purchase the tools I use to do concrete floors, stamping, staining, polishing, countertops, sawing and a whole lot more.
 -
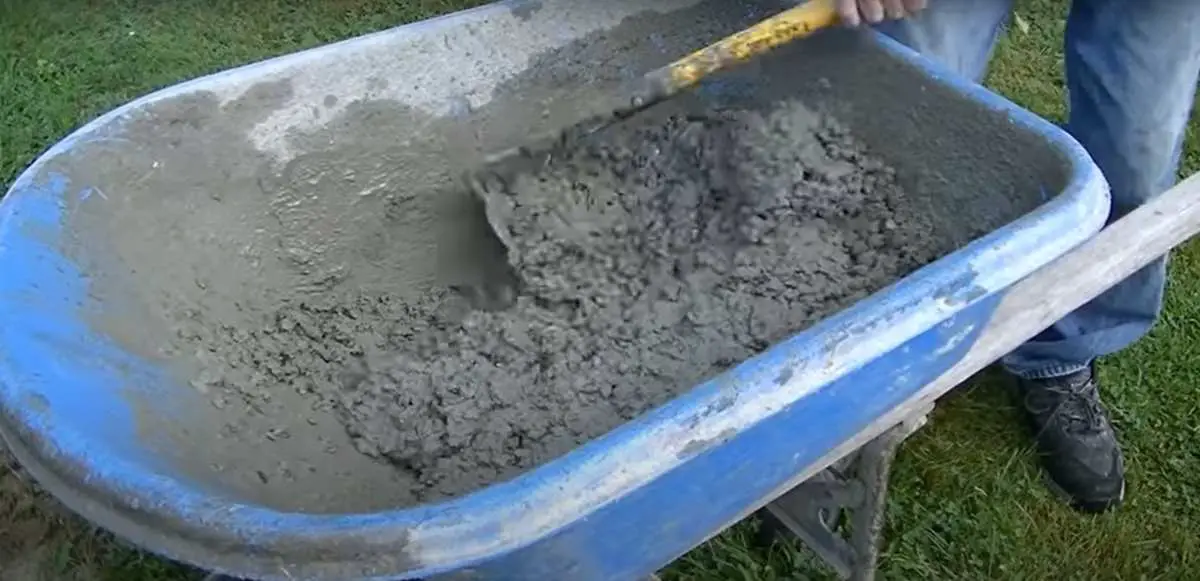
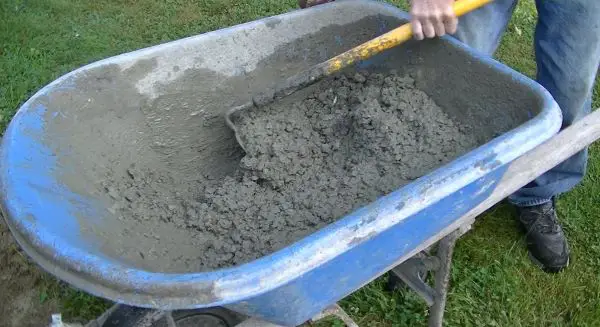
How To Make Concrete Without A Mixer - Mixing Concrete by Hand
 Learn how to make concrete manually without a mixer. Explore simple steps and tips to achieve the right consistency and strength for your construction project.
 -
What are the Correct Concrete Mixing Ratios - Ratio Chart
 The proper concrete mixing ratios are 1:2:3, 1:3:3, 1:2:4 for cement, sand, and stone. Mixing ratios are based on what psi concrete you need. Mixing ratio chart
 -
Concrete Mix Ratios For 3000, 3500, 4000, and 4500 psi concrete
 Learn the precise mix ratios for concrete strengths of 3000, 3500, and 4000 psi to ensure durability and stability in concrete construction.