epoxy 3d flooring - how to do a 3d epoxy floor

What is 3d floor epoxy?
Epoxy 3d flooring is a process of applying a primer coating of self leveling epoxy resin, adhering a 3d floor mural to the floor, then applying a protective, clear, two-part epoxy coating over it.
You can purchase a 3d design or print a "high resolution" image from your phone or camera.
These 3 dimensional floors are being used in bedrooms, bathrooms, kitchens, and living areas on newly built homes or older homes being remodeled.
Unlike stickers or painted vinyl floors, the epoxy resin covering the 3d floor mural gives the floor depth and creates a life like image.
how to do 3d epoxy floor designs
The installation of an epoxy 3d floor design can be tricky, there's no room for error and might be better left to a pro.
But, if you're a die hard diy'er and want to do this yourself, follow the step by step guide below.
- Test the concrete for moisture. Moisture in or below the slab will blister and peel off the sealed epoxy coating causing your new 3d floor to fail.
- Prepare the concrete by lightly grinding it. You need the proper surface profile for the epoxy to adhere to. Grinding will remove any previous coatings, smooth and level a rough surface, and clean any dirt, glue, sheetrock putty, or mildew from the surface.
- Patch and repair any cracks, spalling or holes in the concrete.
- Vacuum, Vacuum again, and wipe the entire floor surface with a micro-fiber mop soaked in denatured alcohol to remove any and all the dust.
- Plan to install on a sunny, warm but dry day with very little humidity. Moisture in the air could cause problems in the epoxy coating.
- Apply the self-leveling primer coating of epoxy and let dry.
- Adhere the 3d floor mural to the floor. Make sure you don't get any wrinkles, folds, or bubbles in it when applying it to the floor.
- Apply 1 or 2 layers of epoxy over the mural and the entire floor to encapsulate it in the floor. The 2nd layer would be to add "more" depth to the desired look but isn't necessary if the first layer looks great.
- You may want to add a protective, more scratch resistant coating of polyurethane if you're installing in a room with a lot of foot or vehicle traffic.

How much does 3d epoxy floors cost per square foot?
Most 3D epoxy floors cost between $10 - $20 dollars per square foot.
The size of the room, condition of the substrate, quality of materials used, and how complex the installation of the 3d mural is, will be what determines most of the cost.
A typical 3d floor installation will take between 3 - 5 days on most floors.
As a diy'r doing this yourself, you may get the cost under $10 per sq. ft. if you don't include your own labor & time.
Pros and cons of epoxy 3d floors
Before deciding to do a 3d floor, let's consider some of the advantages and disadvantages of this type of flooring.
First, the positive things:
- You have a unique, real-life looking floor - the 3 dimensional appearance of these floors makes them look like the real thing. The beautiful visual effect can change the entire appearance of a room.
- Easy to keep clean - It's smooth surface makes it easy to vacuum, sweep, or use a micro-fiber mop. Dirt, dust, and debris don't stick to the surface reducing the amount of time and effort to keep it clean.
- Wear resistant - epoxy with a polyurethane top coat is highly scratch and wear resistant to both foot and vehicle traffic. This makes 3d floors good for commercial applications also.
- Seamless floor - a self-leveling 3d epoxy floor coating can be a seamless floor if all the joints and cracks in the floor are filled before applying the epoxy. A seamless floor is great for bathrooms and kitchens where the floor tends to get wet at times.
- Waterproof flooring - a seamless epoxy 3d floor is also waterproof. Water will not penetrate a properly applied epoxy floor.
- More hygienic - epoxy 3d floors do not harbor dust mites, pathogens, mold, mildew, or bacteria. This makes them great for people with allergies.
- Fire resistant - epoxy doesn't burn like wood, linoleum, laminate, or carpet floors do. This makes it a much safer flooring material if that's a consideration factor.
Now, the negative things: (although these may not be negative to you)
- Epoxy can be difficult to install - If you don't have any experience installing epoxy floor coatings, they can be a little tricky to get perfect. Experience is definitely a factor here. (Learn how to install epoxy floors with my epoxy flooring course)
- Cost is kind of high - compared to some traditional types of flooring, a 3d epoxy floor can be as much as twice the money.
- Kinda cold on the feet - unless you have radiant heated floors, epoxy flooring is kind of on the cool side, like tile floors are. (could be a positive in the summer though)
- Takes longer to install - Could take 5 or 6 days to install and then stay off it for another 3 to 5 days to let it fully cure before walking on it.

how long does a 3D epoxy floor last?
In most residential houses, 3D epoxy flooring will last between 15 and 20 years. This takes into consideration proper care and maintenance of the floor.
Commercial 3D epoxy floors will last about 5 - 10 years, maybe longer, if there's not too much foot traffic on them.
Keep in mind, if the top-coat looks a little dull or worn from traffic, it can be sanded and re-top coated to make it look like new again as long as there's no damage to the image.
The amount of use, type of foot traffic, and daily maintenance of these 3d epoxy floors is what really determines how long they will last.
3d epoxy flooring images
Here are some pictures of 3D epoxy floor images you can have for your floor.

Diy 3d epoxy flooring materials
If you're going to do a 3d floor yourself, you're going to need the following supplies:
- A 3D floor mural or your own printed image (Amazon and Etsy have 3d floor murals)
- Clear epoxy for your primer coat and top coat
- Polyurethane protective coating over the epoxy top coat (it's more scratch resistant and more chemical resistant than epoxy)
- Battery drill, mixing paddle, rollers, brushes, measuring buckets, gloves (you'll be glad you got my epoxy training course to teach you how to install epoxy on a floor)
If you decide to use an image on your camera and have it enlarged & printed, it'll have to be a "high-resolution" image of at least 300 dpi.
Check with the printing company to see how large they can "enlarge" your image before it starts to look distorted.
You can purchase 3D Floor stickers on Amazon and Etsy. There's hundreds of different themed floor stickers to choose from.
some tools you'll need to install your 3d floor
You'll need some tools to clean the floor and lightly sand or grind the concrete if you have concrete floors.
- A good shop vac
- 4" or 7" concrete hand grinder with vacuum shroud
- Safety glasses
- Ear protection
- Face mask
- Gloves
When you install the 3d floor mural a plastic squeegee helps lay it down flat and a plastic roller helps smooth out any bubbles and wrinkles.
sealing your 3d floor with 2-part polyurethane
Sealing your 3d floor with polyurethane will dramatically prolong the life of the floor and protect it against scratches from foot traffic.
A top coat of epoxy will give the image more depth which is a better look. But epoxy scratches easier than poly so you need to protect it.
Epoxy also turns a bit yellow in direct sunlight (think big windows where the sun shines through) so adding a layer of UV resistant polyurethane over it will help prevent this.
So epoxy along with polyurethane is the best method on most 3d floors.
Note: never use epoxy outside, it's just for inside use.
3d epoxy floor installation
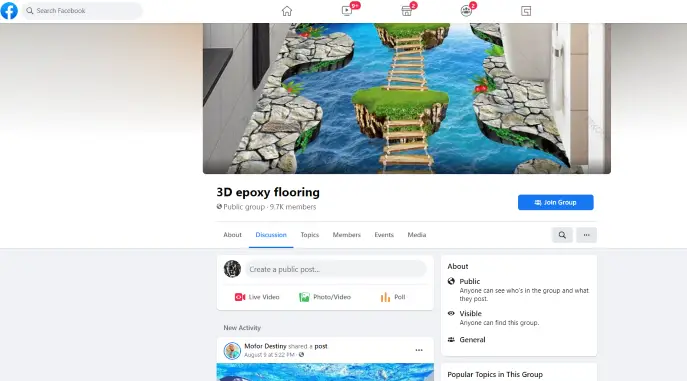
If you're looking for someone to install your epoxy 3d floor, look no further than Facebook.
There's a few Facebook groups you can join to ask if someone local installs 3d epoxy floors.
The Facebook group in the picture is one you can search for, it has over 9000 members with a lot of those members being installers.
Hiring a pro usually means your 3d floor installation goes smoother and faster.

Hi, I am Mike Day, owner of Day’s Concrete Floors, Inc. in Maine. I've been working with concrete for 45 years now, and this website is where I can share with you all the knowledge, wisdom and expertise I've gained from installing all kinds of stamped concrete, concrete floors, concrete overlays, concrete slabs and also repairing & fixing cracked or spalled concrete.
There’s a lot to cover, so if you have any questions, contact me!
CHECK OUT OUR SPONSORS


LEARN HOW TO EPOXY A GARAGE FLOOR

FREE CONCRETE FINISHING TRAINING TUTORIAL VIDEO
Recent Articles
-
The Most Frequently Asked Questions About Concrete
 Find the answers to the most frequently asked questions about concrete on the internet
 -
How Many 60lb Concrete Bags Make A Cubic Yard? The Complete Guide
 Discover the number of 60lb concrete bags needed for a cubic yard. Get accurate calculations for your construction project.
 -
The True Cost of Polished Concrete: A Detailed Breakdown
Get the facts on polished concrete floor cost. Learn average prices per square foot and key factors impacting your budget in this guide -
How To Fix A Leak In A Basement Wall - Foundation Crack Repair
 How to fix a leak in a basement wall. I have a video tutorial that shows you the steps to take to fix a crack in your foundation wall.
 -
How much does a concrete patio cost for 2025 - New Updated Prices
 New and updated prices for what a concrete patio will cost you in 2025.


