How To Finish Concrete
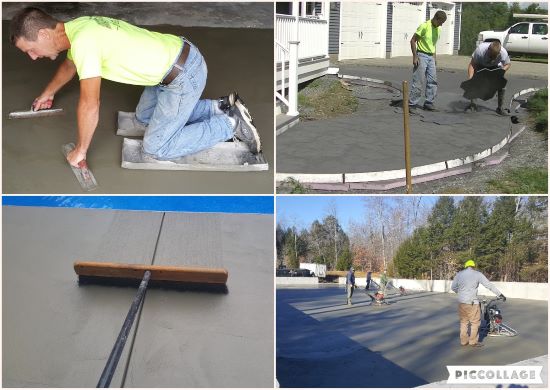
On this page I will go over how to finish concrete with the following techniques:
- Hand Troweling
- Power Troweling
- Broom Finish
- Stamping
Finishing concrete, whether your hand troweling or power troweling the concrete smooth or giving the concrete some texture with a broom or stamping, will require some type of experience or knowledge.
That's what I'm going to provide you with. I've been a concrete finisher for nearly 40 years and have extensive experience in all types of concrete finishing that I want to share with YOU!
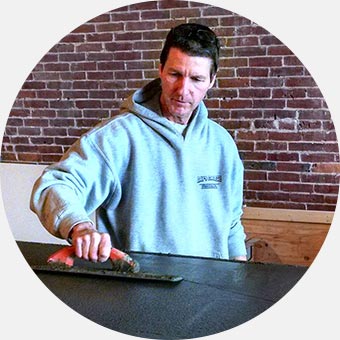
How to finish with a hand trowel
If you have a small concrete slab or floor and you want to achieve a smooth finish, using a steel trowel is going to be your best bet to finish the concrete.
A hand trowel will give you a very smooth finish to the concrete if you know the proper procedure on how and when to start using it.
The basic steps for finishing concrete are:
- After pouring the concrete let the concrete firm up enough so you can only press your fingers into the surface about 1/4 of an inch.
- On your first finishing pass, use a mag float to smooth the surface. With moderate pressure, move the mag float in a back and forth motion. This motion will change the texture of the surface, working up some creme and cement paste.
- Once you've gone over the entire surface, let it dry a little before using your hand trowel.
- Start troweling using the same back and forth motion as you did with the mag float. Slightly tip the edge of the trowel up a bit in the direction you're moving it. Go over the same area 2 - 3 times and it will start to look smoother.
- Don't worry if you're leaving a few small lines from the trowel, you will remove them on the next pass.
- After troweling the entire surface, let the concrete dry a bit more.
- Trowel the surface again the same as the first time you troweled it. The surface should be drier and harder now. Smooth out your trowel marks from the previous pass, the surface should be looking smoother now.
- Continue this process as many times as necessary to get the desired smooth finish you want.
Some other tools you may need are:
See my videos below where I'll not only show you and teach you how to do this, but also the correct time to start finishing.
How to finish with a power trowel
If you have a large concrete floor or slab, the best way to get a smooth finish is to use a power trowel.
As a concrete finisher, I can tell you, learning how to use a power trowel will take some practice.
I'll have a video below that'll show you the basics, but be prepared, it's not as easy as it looks.
If you're renting one, make sure the rental company shows you how to start, hold on to, and move the machine right and left. This is very important for your own safety.
The most important part of getting your concrete floor smooth using a power trowel is knowing when to start.
If you start troweling too early, you could potentially create humps, dips, or a wavy surface that you won't be happy with.
If you start too late, it'll be hard to get the concrete as smooth as you like.
There's a couple ways I test the concrete to see if it's ready to start power troweling.
- Using my hand, I press my fingers into the concrete. If I can only press into the concrete about 1/8 to 1/4 inch, this tells me the concrete is close to or ready to start power troweling.
- If I can only press my fingers into the surface 1/8 inch, I try walking on the surface. If I only sink into the surface 1/16 to 1/8 inch with my feet, the concrete is ready to power trowel.
IMPORTANT: If you start power troweling and you start "sinking" in more than this or the power trowel starts digging into the surface and creating waves or humps, just stop and wait a little longer then try again.
If the concrete seems ok, then run the trowel in an east to west motion across the surface, covering the entire floor. Start furthest away from where you want to stop and work your way backwards.
When you've troweled the entire surface you may have to stop and let the concrete "dry out" a while before going over it again.
The time it takes it to "dry out" will be greatly dictated by the outside temperature and if it's in the direct sun. (And how fast you are)
It will (should) take multiple passes with the power trowel to get a very smooth finish. Maybe 3, 4, or 5 depending on how fast the concrete is curing.
Cross your pattern each time you power trowel the surface. If you started with an east/west pattern, go north/south next time and so on.
The videos below will show you how we do it and help you understand the basics. This will be your best place to start learning how to operate a power trowel.
How to Broom Finish Your Concrete
If you want a non-slip surface on your concrete, then a broom finish is what you're looking for.
In my opinion, learning how to do a broom finish is a little easier than doing a smooth steel trowel finish.
If you're broom finishing a concrete patio, pool deck, sidewalk, or a driveway, the basics are the same.
Knowing when to start is the key to success in my book. Much like above, you start the finishing process when:
- Start to mag float the surface when you can only press your fingers into the surface about 1/4 of an inch.
- After you mag float the surface, drag the concrete broom across the surface in a backwards motion pulling it towards you.
- Continue this process working your way from one end to the other until you've broomed the entire surface.
- If you can't reach the entire area from the outside edges, you will need a set of concrete skids like we use to get onto the concrete.
Check out my videos below for a visual guide on how to do the perfect broom finish on a concrete patio.
How to do a Stamped Concrete Finish
A stamped concrete finish is by far one of the most advanced types of concrete finishing.
I've been stamping concrete for over 30 years and the best advice I can give you if you're set on trying this yourself is start with something small. (and watch all my stamping videos on YouTube.)
I even have a course that will teach you "How to stamp concrete."
I would highly recommend taking my course, it's well worth the investment and teaches you all the basics you need to know.
When I first started stamping concrete the most difficult part of the process for me was knowing when to start.
Setting that first stamping mat, then the second, third, and so on, really takes some getting used to.
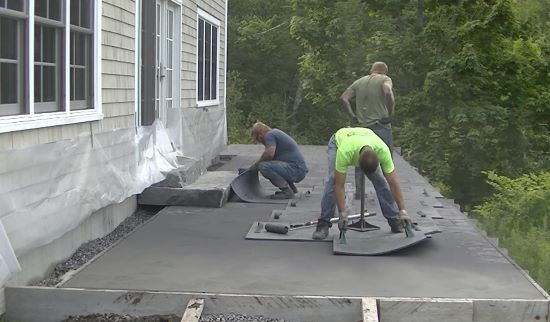
Starting the stamping process is different than the above finishing methods. You have to start stamping a little earlier than if you're doing a broom finish or a trowel finish.
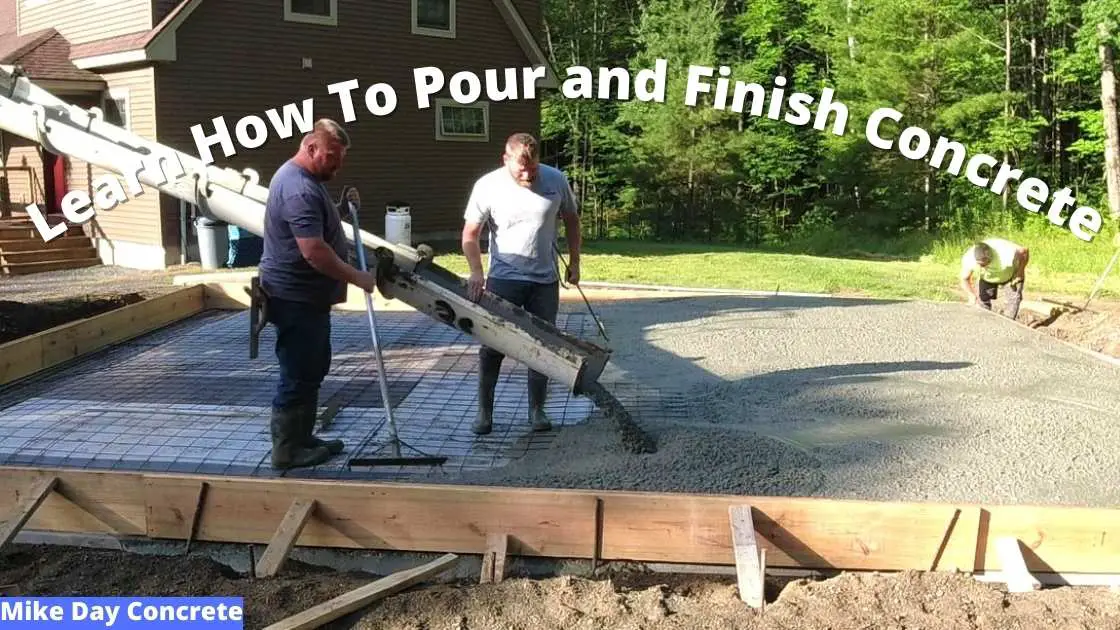
Here's the basic process: (after you've got the concrete poured)
- Check the concrete by pressing your fingers into the surface, you should be able to press in no more than 3/8 to 1/2 of an inch.
- If you can only press you fingers into the surface 3/8 to 1/2 inch, then that tells you it's ready to start mag floating or funny floating the surface.
- Once you have the surface mag floated, start broadcasting your powder release agent onto the surface. Completely cover the surface with this powder.
- Determine where you're going to start stamping and set your first stamping mat.
- Step on the first mat and if it supports your weight without you feeling you're sinking into the concrete, you're good to go. (you shouldn't be sinking in any more than about 1/4 inch)
- Set your second, third, and forth stamps (more if you have them).
- After you've set all you stamps on the surface, start tamping them lightly into the surface with your tamper.
- After you've tamped your first stamp, slowly lift it straight up and look to see if you've got a good stamp impression in the surface of the concrete. (if not, set it back down and re-tamp it).
- If you have a good impression, move that stamp to the next place in line. (next to the last stamp you placed)
- Keep doing this process until you've stamped the entire surface. Moving one stamp at a time, picking it up and re-setting it in a new area.
You can buy concrete stamps here. Use coupon code EAC to save 10% when you checkout.
NOTE: Most concrete stamps have a particular way they connect together. If you're unsure how they connect together, try connecting them on the ground before you start stamping.
Watch my video below for a visual presentation on how stamping concrete finishes is done.
If you want to learn more about stamping concrete watch the video below
This video is made for beginners who want to learn how to stamp concrete.
There's very little training out there for learning stamped concrete. This video helps solve that problem.
I introduce you to some training you can get from me. I'll coach you, teach you, help train you, so you can stamp your own concrete or start your own stamped concrete business.
Another great resource for learning to stamp concrete is a page I wrote detailing all the steps it takes on how to stamp concrete.
Another way to learn how to finish concrete!
I made a very easy to follow but very in depth concrete slab course that teaches you how to install, pour, and finish a concrete slab.
In the course I have some videos where I teach you how to finish the concrete. This course is another great tool for you to start to learn how to finish concrete.
I also have recently created the CONCRETE UNDERGROUND for even more information about concrete.
In conclusion:
If you want to learn how to finish concrete. I'll help you learn the basics by providing you with information and videos that explain and show you how I finish my concrete jobs.
If you want to take you're concrete finishing skills to the next level, then my courses will help you do that. (Plus my courses allow you direct access to me for questions and answers).
You can also check out my YouTube channel for a lot more information on concrete finishing. The video below is my most recent video about finishing concrete.
Learn more about how to finish concrete smooth using a hand trowel.
