Concrete Moisture Test
Updated October 25, 2023
Author: Michael Day
How to test for moisture in a concrete floor or slab.
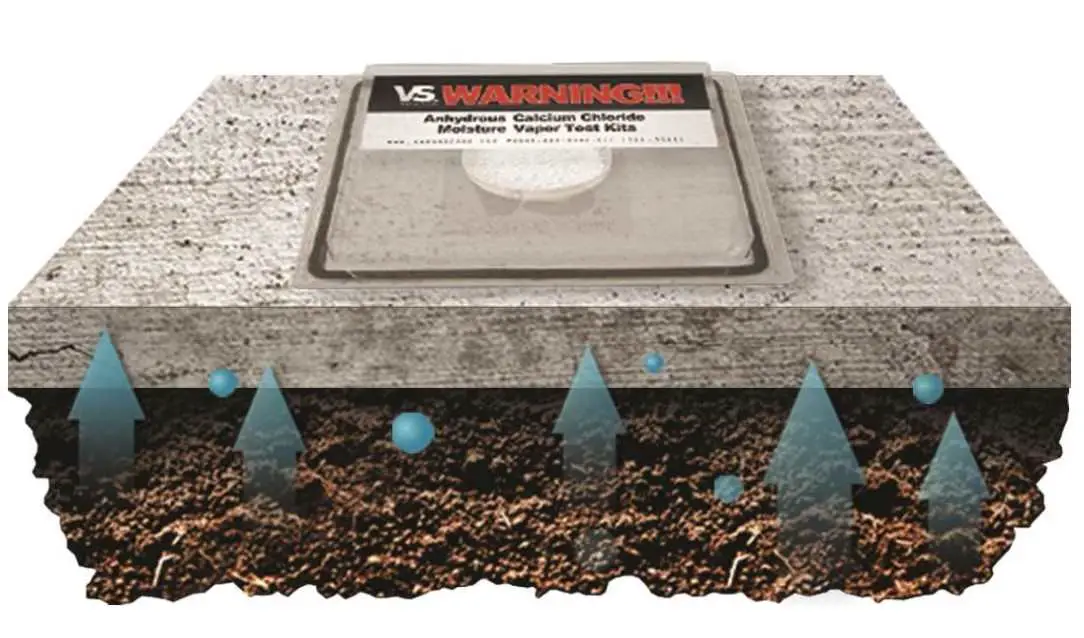
Doing a concrete moisture test before you install any type of flooring over a concrete floor or slab is important because too much moisture vapor transmission (MVT) can delaminate flooring materials like epoxy, linoleum, laminate tile, can buckle wood floors, and can cause mildew in carpeting.
Most all manufactures of these flooring materials have a maximum rate of MVT that their flooring material can withstand before the moisture will
start causing problems. Testing for this moisture vapor transmission rate is relatively easy and can be done by yourself or you can hire someone.
The easiest way to test for moisture in concrete is to duct tape a 2 foot square piece of plastic right to the concrete floor. Only tape the edges,
but make sure they are sealed really good to the concrete. Leave the plastic taped to the concrete overnight (16 hrs), if there is moisture under the plastic when you peel it off or if the concrete is darker in color, you have moisture in your concrete and it's too wet to install an impermeable flooring material over it.
How to do a calcium chloride test on a concrete floor
Calcium chloride tests have been around since the 1960's. These concrete moisture test kits are readily available on the internet from suppliers like Amazon (see below). To test, you simply place a pre-weighed dish of calcium chloride on your concrete floor, then cover and seal it with the plastic dome they supply.
Moisture from the concrete floor is absorbed by the calcium chloride when it exits the surface. After 72 hours the test dish can be collected and weighed, the increase in weight is how you determine how much moisture in in the concrete. The increased weight is calculated using an equation and this gives you the moisture vapor emission rate (MVER) of your concrete floor. The MVER is how much water is emitted from the concrete floor in 24 hours per 1000 square feet of floor. 3lbs per 1000 sq. ft. is a common maximum MVER of many flooring materials.
To conduct this test you will need a GRAM WEIGHT SCALE with a gradiation of 1/10 (0.1) gram. The calcium chloride container is weighed before and after you set it on the concrete floor.
It is not recommended you do the concrete moisture test unless the building environment (relative humidity) is the same as the working environment will be. More or less humid conditions in the building can give you false readings that could lead to problems later on.
Here's a calcium chloride test kit you can get on Amazon.
Basic Steps to perform a calcium chloride test
1. Clean the concrete using a wire brush, floor grinder, or shotblaster. There must be no oil, dirt, glue, or mastic on the surface of the concrete.
2. Record the starting weight of the calcium chloride container
3. Open the container and remove the lid
4. Place the open dish on the concrete floor (do not set on a crack or control joint)
5. Seal the dome to the concrete making sure there are no leaks in the gasket
6. Let the test sit on the concrete for 72 hours (protect it with caution tape)
7. After 72 hours collect the dish and weigh again recording the weight
Use the formula below to calculate the Moisture Vapor Emission Rate MVER of the concrete floor.
MVER = 118.932 X Gain / Time
MVER = Moisture Vapor Emission Rate
Gain = Weight gain of calcium chloride crystals in grams
Time = Exposure time in hours
The result is expressed as "pounds", which is the equivalant weight of water, emitted as vapor, over 1000 square feet of floor area in 24 hours time. You can use this result to compare to Manufactures specifications for their floor coverings and coatings tolerances.
Here is a worksheet to help you calculate the results.
How to do a relative humidity test on a concrete floor
Basic steps to perform a Relative Humidity test in concrete floors & slabs
1. Purchase a Tramex RH moisture test kit (easiest way to test for RH in a Concrete slab)
2. Clean area and drill 3/4 inch hole to 40 percent of slab thickness, clean & vacuum out hole
3. Insert the sensor to the bottom of the hole
4. Wait short initial equilibration time then check readings
For full in-depth directions on how to perform a Relative Humidity test on concrete floors and slabs see: Performing RH testing in concrete floors and slabs or watch the video.
You can purchase a RH test kit on Amazon.
Return from Concrete moisture test to Concrete vapor barrier
Return from Concrete moisture test to Everything About Concrete Home Page
