My 7 Tips For Getting Better Looking Stamped Concrete
Get the downloadable PDF version
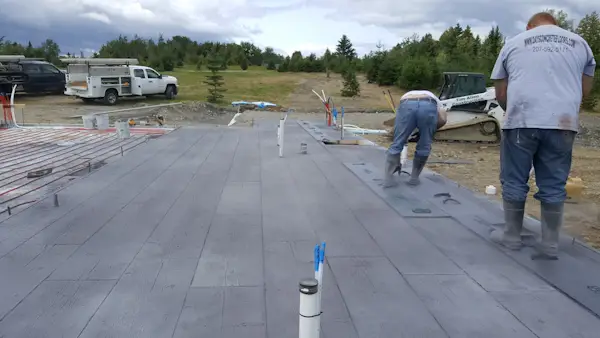
Stamped concrete can be beautiful when it’s done correctly. However, poorly textured stamped concrete isn’t as nice, and in some cases is quite “fake” looking which defeats the purpose of stamping the concrete in the first place.
Often, when stamping concrete, some spots are missed because of improper timing or just being inexperienced. If powdered release is being used, these “missed spots” don’t become visible until the concrete is being washed before sealing.
Most stamped concrete guys, myself included, have seen these scenarios and have learned from their mistakes.
Over the years I’ve learned several important tricks that help us achieve better looking texture on our stamped concrete projects.
Having better looking texture means having more realistic looking stamped concrete.
1. STAMP THE CONCRETE EARLY
In all my years stamping concrete I learned timing is everything. Getting on the concrete as early as possible and stamping with just foot pressure will usually give you the best texture.
If you need a tamper to “bottom out” the stamp and get all the texture, you didn’t start early enough.
You’ve got to be able to push the joint lines of the stamp into the concrete to get the full texture of the stamp. If the concrete is too firm, the joint lines will hold it above the surface giving you some texture in the middle of the stamp but none around the joint lines.
Starting too early could give you “bird baths” meaning the workers are sinking in too much in the middle of the stamps. Learning to start at the proper time takes some experience but pays dividends in the long run.
2. USE EVAPORATION AND SET RETARDERS
When stamping concrete, the weather plays a factor in every pour. Is the pour in full sun? Is it partially shaded? Is it sunny and windy? Is the temperature very hot or is it chilly outside?
How large of an area you decide to stamp at one time can be determined by what the weather is going to be.
To help keep the surface from drying out or crusting over, apply an evaporation retarder. When sprayed on the floated surface it forms a thin film, holding in mix water longer. It slows evaporation but not set time.
When stamping a larger pour a set-retarder can be batched into the concrete mix to slow set times. Allowing more working time. There are also mini-delayed set packs that can be added on site half way through a pour to slow the remaining load’s set time so the second half of a trucks load doesn’t get away from you.
3. MAG-FLOAT THE SURFACE
Getting on the surface and mag floating it with kneeboards allows you to fill any voids left behind by the bull-float, remove bull-float lines, and bring some “cream” to the surface.
Working the concrete surface just before stamping will help ensure you get the best-looking texture from your stamps.
Trying to stamp a bull-floated or fresno surface will likely mean your stamping a dry or crusty surface which will lead to crusting cracks as you press the stamps into the surface.
Hand floating the surface eliminates crusting cracks and provides a more consistent looking texture that’s more slip-resistant when sealed.
4. USE A TEXTURED ROLLER
Use a 9-inch texture roller to do your edges, around pipes, and around columns. When we switched from doing edges with small texture mats to a texture roller it dramatically increased the speed of our stamping process.
The texture roller fits right onto a 9-inch paint roller making it very easy to use. By using a handle with the roller, you can eliminate some bending over and get way out in front of you. Just throw your release, roll in your texture and that’s it.
 Textured roller cover for 9 inch roller
You
could also get a large texture roller, 18 inches or 24 inchs and roll the entire
surface before you stamp. This will ensure you get texture on the entire
surface even if the slab starts to harden as you finish up.
Disclaimer: I am an affiliate of Amazon. If you purchase the texture roller I will make a small commission.
5. WEAR TEXTURED SOLE SHOES
Wearing textured shoes that slip on over your boots will allow you to get on the concrete earlier to start the stamping process. They’re basically like a pair of oversized sandals with texture on the bottom.
They distribute your weight over a larger area making it less likely
you’ll sink into the surface. The shoes texture comes in many of the same
textures as the stamps you use. This also helps eliminate stepping off a stamp
and leaving a boot print that’s difficult to remove.
 Textured stamping shoes
6. PLAN YOUR STAMPING PROCESS
Make sure you know how you’re going to start and finish the stamping process. If you start the pour in one area is that going to be where you start the stamping process also. Maybe or maybe not.
Is the sun going to hit this area first, this is where the concrete usually starts setting the fastest? Is the area you start the pour even accessible to start stamping when the concrete is ready.
Plan this all out in advance, lay out your stamps in advance and know which direction you want your pattern to go. Depending on how the concrete sets, you may be starting in the middle or where the sun hits the concrete first.
Knowing this in advance eliminates any questions and prevents delays when it’s time to stamp.
7. USE LIQUID RELEASE
Liquid release lets you see what kind of texture is left behind when you pull the stamp, much better than when using powdered release.
Sometimes when using powder release, it appears there is adequate texture on the surface, but when washing the concrete, the next day you find the impression was mostly in the release and not in the concrete.
By then it’s too late and you’re left with smooth and shiny areas after you apply the sealer.
The only problem with liquid release is you don’t get the “antiquing” color effect you get with powder release. The solution to this is to use a product like getnewlook.com’s Tique Wash.
You just brush it on after washing the slab to get the antiquing effect the powder release would give you. It puddles in the low areas and bonds like crazy giving the concrete great contrast that lasts for years.
That’s it! My seven tips for much better looking stamped concrete. Try one or try them all to up your game and give you an edge against the competition.
Mike Day
www.everything-about-concrete.com
Day’s Concrete Floors, Inc.

Hi, I am Mike Day, owner of Day’s Concrete Floors, Inc. in Maine. I've been working with concrete for 45 years now, and this website is where I can share with you all the knowledge, wisdom and expertise I've gained from installing all kinds of stamped concrete, concrete floors, concrete overlays, concrete slabs and also repairing & fixing cracked or spalled concrete.
There’s a lot to cover, so if you have any questions, contact me!
CHECK OUT OUR SPONSORS


LEARN HOW TO EPOXY A GARAGE FLOOR

FREE CONCRETE FINISHING TRAINING TUTORIAL VIDEO
Recent Articles
-
The Most Frequently Asked Questions About Concrete
 Find the answers to the most frequently asked questions about concrete on the internet
 -
How Many 60lb Concrete Bags Make A Cubic Yard? The Complete Guide
 Discover the number of 60lb concrete bags needed for a cubic yard. Get accurate calculations for your construction project.
 -
The True Cost of Polished Concrete: A Detailed Breakdown
Get the facts on polished concrete floor cost. Learn average prices per square foot and key factors impacting your budget in this guide -
How To Fix A Leak In A Basement Wall - Foundation Crack Repair
 How to fix a leak in a basement wall. I have a video tutorial that shows you the steps to take to fix a crack in your foundation wall.
 -
How much does a concrete patio cost for 2025 - New Updated Prices
 New and updated prices for what a concrete patio will cost you in 2025.


