How to apply an epoxy coating to a garage floor
my exact step by step method

Approximate working time: 7 hours
Total time to finish: 2 days
Skill level: Medium
Total Cost: $2.00 per square foot
The best way to finish off your garage floor is with an epoxy floor coating. An epoxy coating is much more durable than "regular concrete paint".
Epoxy will give your garage floor a showroom finish that'll be easy to clean and protect the concrete from wear, staining, and salt damage.
The steps required to apply an epoxy coating are different than paint. Understanding the process from concrete prep to rolling on the final top-coat is the key to a successful project.
can i epoxy my garage floor myself?
If you're the type of diy'er that's not afraid to tackle a project that requires some hard work, then YES, you can do it yourself.
You're going to want to plan on doing the prep and base coat of epoxy the first day, then do the top-coat the 2nd day.
I recommend giving the new epoxy floor 48 hours to cure after you're done before moving stuff back into the garage and driving on it.
If you want STEP BY STEP video training, I created a very detailed course for you that'll show you each step in detail. The course covers how to prep, fixing cracks, what epoxy to use and where to get it, applying the base coat and flakes, and rolling on the protective top-coat.
YES, I want the course! The course will ensure you install your epoxy garage coating just like I do.
is it worth it to epoxy my garage floor?
I feel it's worth it to epoxy your garage floor because not only will you have a beautiful looking floor, epoxy will protect your floor from oil stains and other fluids that may leak from your vehicle.
Garage floor epoxy will bead water and make the floor easier to wash or sweep and keep clean.
Using color chips, you can choose from a variety of colors versus just using a regular grey epoxy color.
An epoxy flake coating will hide minor imperfections as well as give the floor some anti-slip qualities for those times when the floor gets wet from melting snow and ice.
a few tips from a professional epoxy floor installer
 That's me installing an epoxy flake coating inside a finished garage.
I install epoxy flake garage floor coatings for a living. There's some things I'll share with you that these other blog pages aren't telling you that could lead to your new epoxy floor failing.
- Pro's never wash or etch the garage floor before doing an epoxy coating. Water and moisture vapor are very bad for epoxy floors. Introducing water into the concrete from washing, etching, and rinsing could lead to blisters and peeling in a very short time after coating it. I'll show you the best way to prep the concrete below.
- If you have a white "powdry" substance coming up through your concrete floor, that's called efflorescence. That's another name for moisture vapor coming up through the concrete from the sub-grade below. That's potentially a big problem and could lead to your new epoxy floor peeling off. I would consult with a PRO before moving forward.
- Pro's don't use inferior/cheap big box store epoxy coatings. I use high quality epoxy from a reputable manufacture. Cheap epoxy isn't as durable, goes on too thin, and is much more likely to peel off, especially under the tires of your vehicle.
- You have to apply a clear protective top-coat of Urethane or Polyaspartic to protect the epoxy coating. If your epoxy kit doesn't include this step, then it'll soon get damaged, scratched, and look very worn in no time.
- Epoxy will "yellow" in direct sunlight. The UV rays from the sun will turn epoxy yellowish in color. You have to protect the epoxy with either a UV resistant Urethane or better yet a clear Polyaspartic top coat. That's what the Pro's do.
NOTE: Polyaspartic and Urethane coatings are similar to epoxy but just a little different chemistry. They're both more UV resistant, scratch resistant, and chemical resistant than epoxies are.
You mix them and roll them on the concrete floor very much the same as you do epoxy.
the tools, supplies, and materials you'll need
TOOLS AND SUPPLIES:
- Battery drill and mixing paddle
- 5 QT and 10 QT measuring buckets
- 4" and 18" 3/8 nap roller covers
- Roller handles and roller frames
- 2" chip brushes
- Rubber gloves
- Epoxy spike shoes
- Floor scraper
- Paint sticks
- Good Vacuum
- Protective mask
MATERIALS:
- Poly Armour 90 Base Coat
- Armour Tint (Color for base coat)
- Deco-Crete Armour Chip (Flakes)
- Top Coat (Poly Armour 90)
- Diy crack repair kit (only if you need it)
- Acetone or Paint thinner (cleaning up)
Tools you may need to rent if you don't already have them.
- Floor buffer machine (to prep the concrete)
- Diamabrush attachment (goes on floor buffer for prep)
- Dewalt 4.5" hand grinder with vacuum attachment (for prepping the concrete)
- Diamond cup wheel (goes on hand grinder for prepping the concrete)
- Hepa vacuum to attach to grinder (better than a shop vac)
I use these same tools to prep my garage floors before I apply an epoxy coating. Using these for the prep work is better than etching the concrete. You keep the concrete dry and give the concrete a much better surface profile for the epoxy to adhere to.
step 1. evaluate your garage floor
What condition is your garage floor in:
Is it new or "older" but in great condition with no cracks or damage? Then you're ready to start the prep.
Is it older with some cracks, pop-outs, small holes, chipped areas, or even some spalling from salt damage? I'll show you how to repair these. Then you can do the prep.
Does it have oil stains? You have to address this first or your epoxy coating could fail in this area.
Do you see any signs of moisture (like I talked about above) if so, it's better to consult with a PRO or you're taking a risk your epoxy floor will fail and you'll be wasting a lot of money. ( I address this and show you how to check for moisture in my epoxy floor course).
step 2. the best way to prep concrete for an epoxy coating
Most other "Non-Pro's" will tell you to wash, degrease, etch, and rinse your garage floor to prep it for an epoxy coating.
I'm telling you the Pro's don't do that, ever. Water is the enemy of epoxy. A pro always lightly diamond grinds the floor for prep. It keeps the concrete dry and gives you a better surface profile the epoxy will bond to.
You can use a 4.5" or 7" hand grinder with a diamond cup wheel attached to a vacuum or rent a walk behind concrete grinder. Both will do the job fairly quickly.
Also, you could rent a floor buffer with a Diamabrush attachment to clean and lightly grind the surface.
The picture below shows me using a 7" hand grinder with a diamond cup wheel that's attached to a vacuum. This method cleans and prep's the concrete at the same time.
It also removes any paint or sealer that might be on the concrete. A must do if you're applying a new epoxy coating.
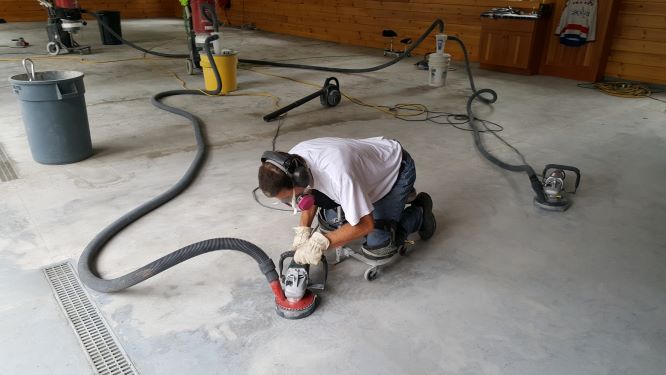 Using a 7" hand grinder and vacuum for prep
The video below shows you the Diamabrush attachment on a floor buffer. This is also a very effective method for cleaning and prepping the concrete for an epoxy coating.
You can get both the floor buffer and Diamabrush at most any tool rental store.
After you're done with the PREP work, vacuum the concrete thoroughly and you're ready to apply the base coat of epoxy.
step 3. apply the epoxy base coat and flakes
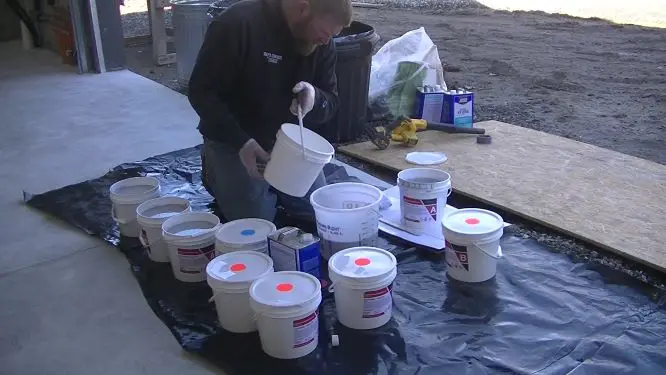
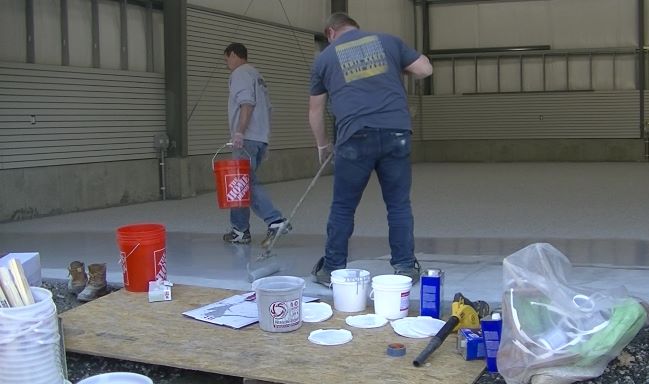
The first thing I like to do is set up my mixing station. Being organized and understanding how to mix your epoxy (or polyaspartic) coating is extremely important.
Most good epoxies are mixed at a 2:1 ratio. Usually 2 parts A to 1 part B. (Some are 1:1) depends on the manufacturer.
The epoxy base coating I use, Poly Armour 90, is applied to the concrete at 220 square feet per gallon.
I mix 1 gallon at a time, 2 quarts A to 2 quarts B, because it's easier to measure in the measuring bucket. This will do about 220 square feet.
I separate my part A's and my part B's, taking off the covers to speed up the mixing process.
I measure out 220 square foot sections of my garage floor and mark the area on the wall with a small piece of blue painters tape. That way I know exactly how much floor space to roll out each 1 gallon of mixed polyaspartic.
PRO TIP: Each manufacture of polyaspartic or epoxy has their own mixing instructions. Please read and follow them to the tee. If you don't mix the epoxy correctly, you'll have a mess on your hands.
I mix the polyaspartic we use with a battery drill and mixing paddle on a low speed for 2.5 minutes. As soon as I get done mixing it, I dump it all out on the floor. Read below.
Next, I'll ribbon out some epoxy along the edges in my marked area and cut in the edges with the chip brush. You'll need a 2nd person for this part.
Then I'll dump out the rest of the epoxy in the bucket in the first measured area spreading it randomly.
Don't leave the epoxy setting in the bucket at any time, dump all of it on the floor or it'll heat up fast in the bucket and you won't be able to use it.
Ribbon it out in small lines like below and roll it to spread it evenly. You'll have plenty of time to roll it out if you pour it onto the floor.
Roll it multiple times to evenly spread it in the measured area. As you're rolling the first area, your mixing person should be mixing the next kit for the next measured area.
Continue this process until your garage floor is covered with the epoxy base coat.
Next, you'll want to broadcast the flake into the wet base coat. I wear spiked epoxy shoes and walk right back into it. I have my 5 gallon bucket full of flake, reach inside and grab a handful, then throw them upwards so they spread out as they fall into the epoxy.
I'm completely covering the epoxy base coat with flake as I do this. I don't want to see any "wet" areas through the flake. If I do, then I'll throw on some more flake in that area.
On a small garage floor, 24 x 20 or 24 x 24, I'll roll out all the base coat before I start broadcasting flake.
On a large garage floor like the one above, 60' x 40', I'll broadcast the flake as I'm rolling on the base coat. Each section at a time.
Continue to roll out the base coat without stopping. Once you start this process keep going until you're epoxy is all rolled out and all the flake is broadcast into it.
Once all this is done, you're done for today. Let the base coat and flake cure overnight and you'll top-coat it in the morning.
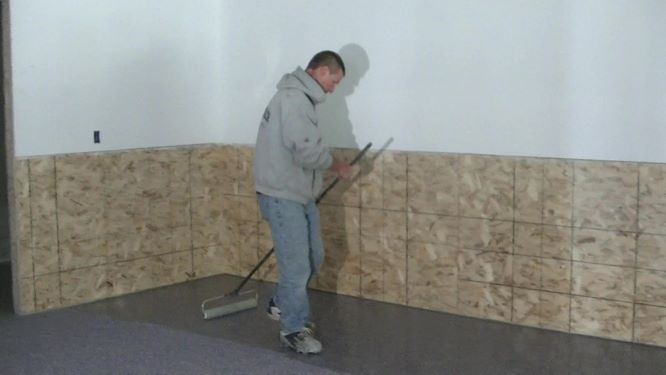
step 4. scrape the flake smooth and vacuum to clean
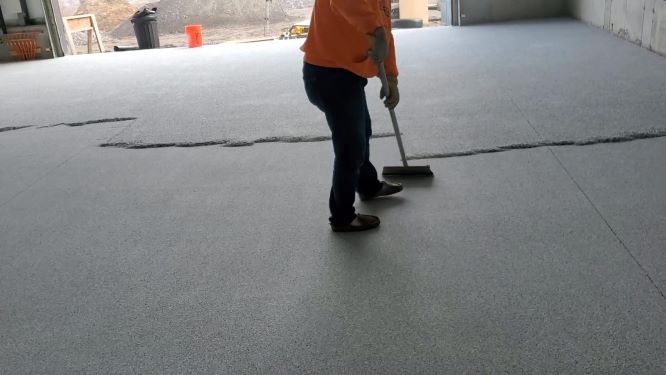
The next day I will scrape all the excess flake off the floor.
This smooths the flake and removes the excess at the same time. I'll scrape it North to South (like in the picture) then I'll scrape it East to West.
After I scrape it and pick up the extra flake, I'll give it a good vacuum to clean any loose flakes and dust I created.
I even take a leaf blower after I vacuum and blow out the entire garage floor to ensure I didn't miss any areas.
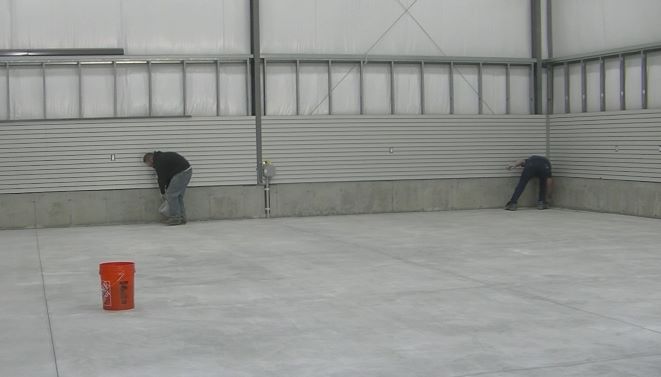
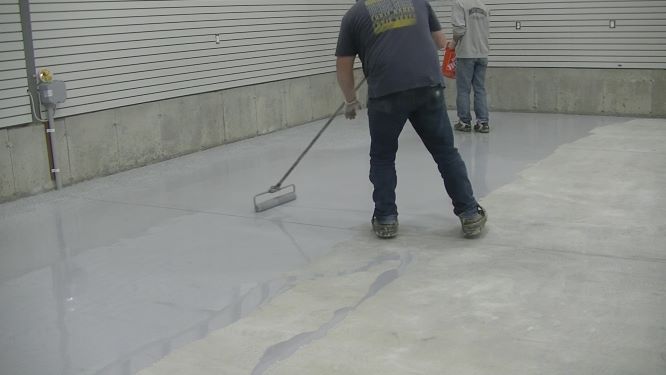
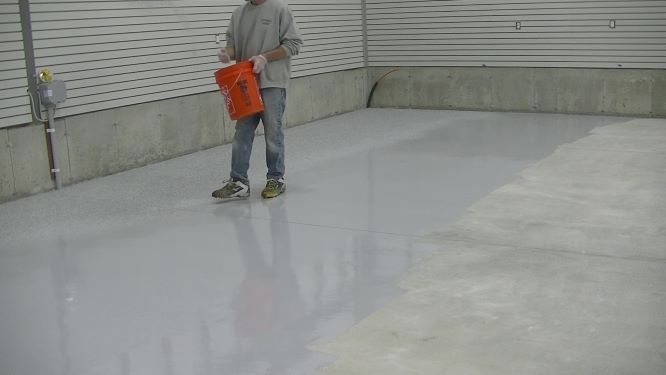
step 5. apply the clear protective top coat
I apply the clear protective top coat of polyaspartic very much the same way as the base coat.
I set up my mixing station and separate my parts A and parts B.
I mix one gallon of top coat at a time, 1:1 ratio for this, and it covers 130 square feet per gallon.
I'll have all my sections of floor measured and marked out.
I ribbon out the polyaspartic, cut in my edges, and evenly roll it out in each measured section.
I use Poly Armour 90 for my top coat. It's UV resistant, very durable, scratch resistant and chemical resistant. Great stuff!
learn how to apply epoxy flake garage floors from me
I made a video training course to teach you how to install an epoxy flake garage floor like us pro's do it.
I cover all the steps and details in this course so you don't make any mistakes. One mistake could be very costly when you're using floor coatings.
You can check out the course HERE.
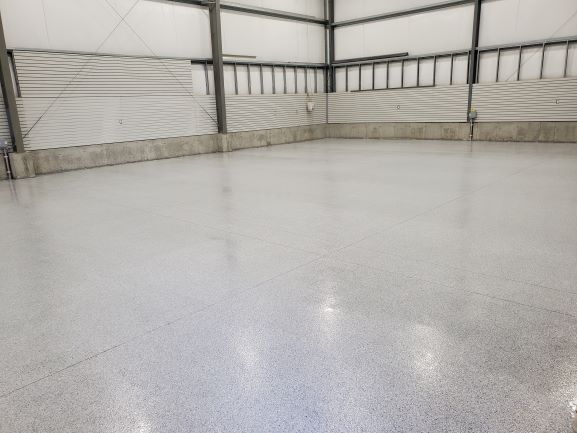 Finished epoxy flake garage floor
IN CONCLUSION:
It's very possible you can do this successfully if you follow my step by step instructions. It is hard work, don't be fooled by others saying this is easy.
It's also very difficult to cover all the little details in one blog post, I tried to cover everything but honestly, my video training is a lot better.
My professional advice on what epoxy to use, don't cheap out and use low quality, inferior epoxy. Expect to pay $75 to $100 dollars per gallon for really good epoxy. It'll last years longer and you won't have to re-coat it if you do this correctly.

Hi, I am Mike Day, owner of Day’s Concrete Floors, Inc. in Maine. I've been working with concrete for 45 years now, and this website is where I can share with you all the knowledge, wisdom and expertise I've gained from installing all kinds of stamped concrete, concrete floors, concrete overlays, concrete slabs and also repairing & fixing cracked or spalled concrete.
There’s a lot to cover, so if you have any questions, contact me!
CHECK OUT OUR SPONSORS


LEARN HOW TO EPOXY A GARAGE FLOOR

FREE CONCRETE FINISHING TRAINING TUTORIAL VIDEO
Recent Articles
-
The Most Frequently Asked Questions About Concrete
 Find the answers to the most frequently asked questions about concrete on the internet
 -
How Many 60lb Concrete Bags Make A Cubic Yard? The Complete Guide
 Discover the number of 60lb concrete bags needed for a cubic yard. Get accurate calculations for your construction project.
 -
The True Cost of Polished Concrete: A Detailed Breakdown
Get the facts on polished concrete floor cost. Learn average prices per square foot and key factors impacting your budget in this guide -
How To Fix A Leak In A Basement Wall - Foundation Crack Repair
 How to fix a leak in a basement wall. I have a video tutorial that shows you the steps to take to fix a crack in your foundation wall.
 -
How much does a concrete patio cost for 2025 - New Updated Prices
 New and updated prices for what a concrete patio will cost you in 2025.


