HOW TO POUR a CONCRETE slab
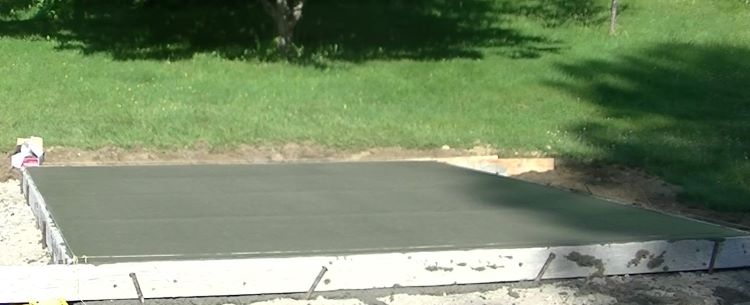

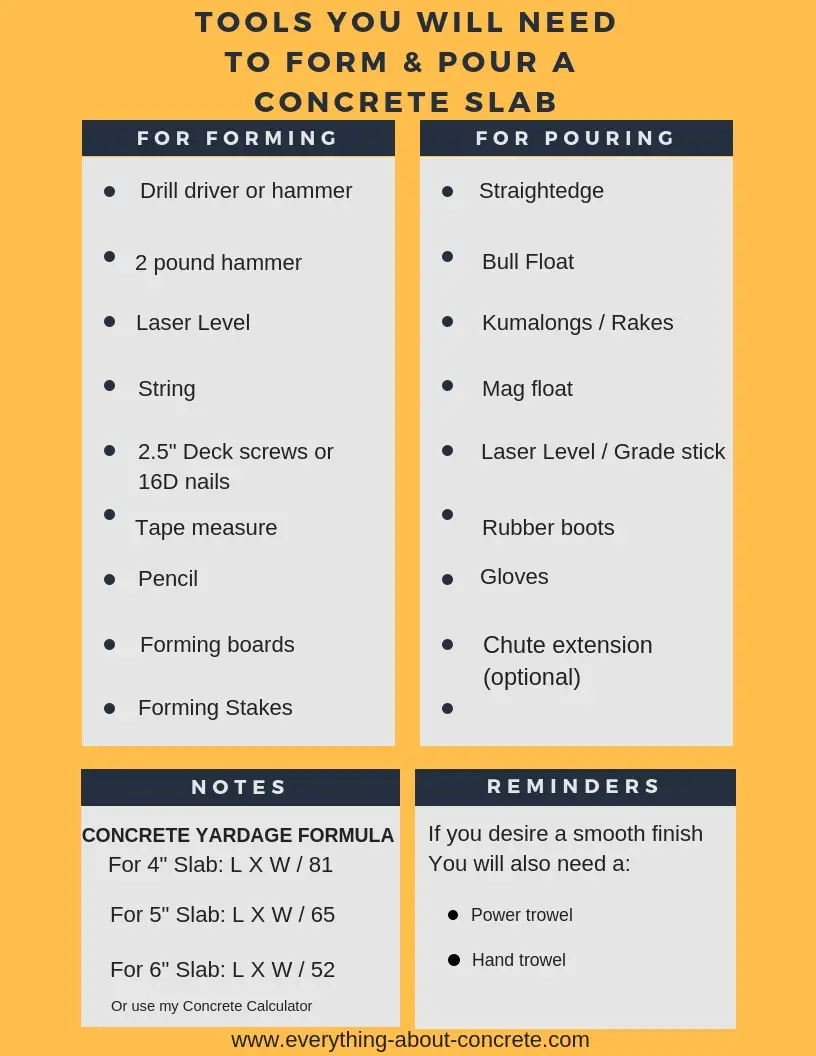
The tools and materials you need to form and pour a concrete slab
MATERIALS:
- Ready-mix concrete (yardage will depend on size of slab)
- Wire mesh or Rebar reinforcement
- Anchor bolts
If your concrete slab is smaller, you can use bags of concrete instead or ready-mix.
Find out how many bags of concrete it takes to make a yard. I did all the calculations for you.
On my Tools Page you can find all the tools required to form and pour concrete.
I also have a concrete yardage calculator that shows you how many yards you need and how many bags of concrete you'll need.
step by step: how to pour a concrete pad
These are the basic steps I use form and pour concrete slabs.
I also have a step by step video course with multiple training videos that teaches you all you need to know about how to install your own concrete slab: My Concrete Slab Course
step 1. prepare the area for concrete
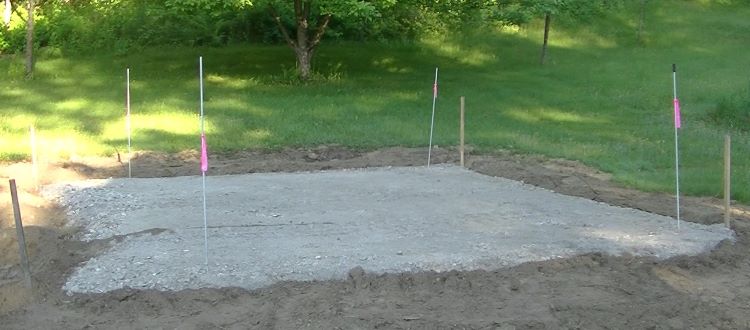
Under your concrete slab there should be a compacted base of gravel. You can also use road base, crushed rock, or sand, as long as it's well compacted.
You'll probably have to remove some of the existing soil like in the picture above. We removed about 12 inches of the existing sod & loam and replaced it with 8" of 3/4" crushed gravel.
This area had a slight slope, so we had to remove more soil on one side than the other to get a level pad.
After installing the gravel, we raked it level (using my laser level) and ran a vibratory compactor over it to settle it and pack it very hard.
NOTE: You may need a permit to install a slab. Contact your local building code officer to see what they require for building a slab. You may also have to keep it a certain distance away from your property line.
PRO TIP: If you have a lot of soil to remove, you can rent a skid steer to do it much easier or hire an excavation contractor to prep the area for you.
BE SAFE: Some states require you to call Dig Safe (811) to check for any underground wires or utilities before you start digging. It's state law. It's a free service so be safe.
step 2. building the forms for a concrete slab
Lay out your forms. It's better to have forms that are a little longer than the size of your slab.
Set up your leveling device. I'm using a self-leveling laser. You can use a 4' level or a transit level. All 3 will get the job done.
My slab size is 14' x 10'.
Starting on one side, measure the length of your slab and mark it on the form. (my mark was at 14' on this side)
Mark each side the same way. (my next side was 10')
You'll use these marks to screw the forms together in the next step.

step 3. screw the forms together and square the slab
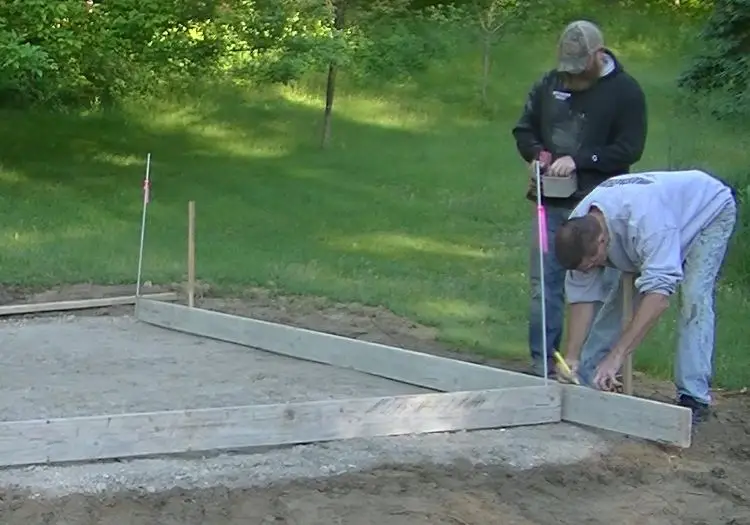
Use your marks to screw the forms together.
Align the inside of the form with your pencil mark.
You can use a drill driver and deck screws like we do or you can use a hammer and nails to fasten the forms together.
I personally like to use screws, there's less movement to the forms because you're not banging on them with a hammer.
Screws are also easier to take out when you go to remove the forms.
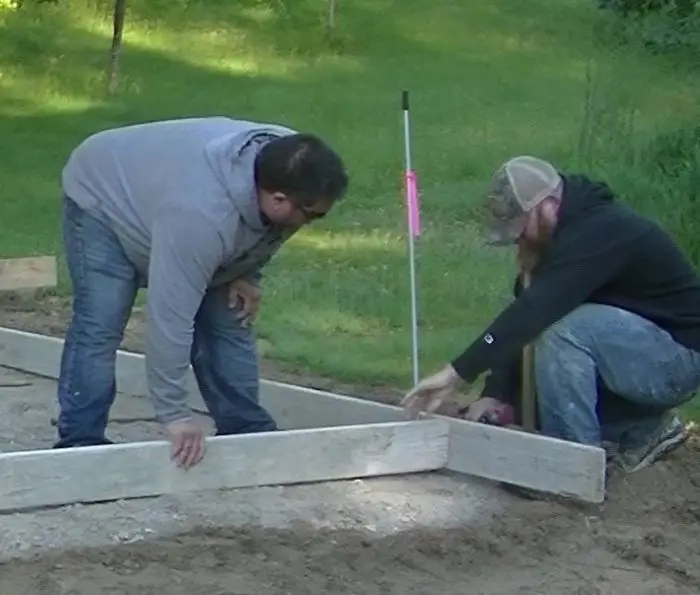
After the forms are fastened together it's time to square the slab.
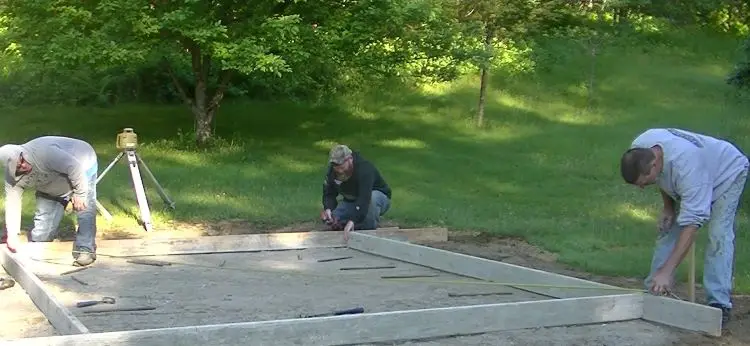
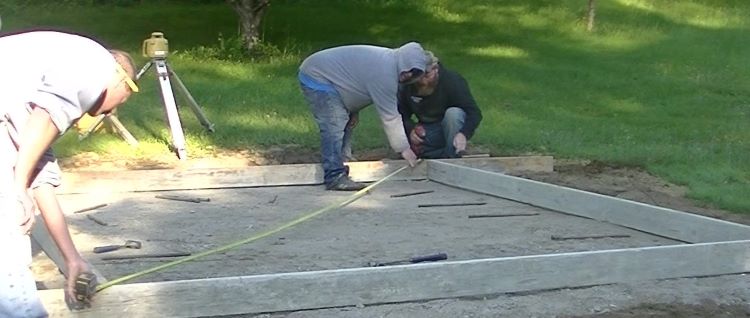
I measure diagonally each way and slide the forms a little one way or the other until I get the exact same measurement for both diagonal measurements.
It usually takes a few times going back and forth checking until you get it exact.
When you have the slab square, you're ready to stake it in place.
step 4. stake the forms and set them to grade
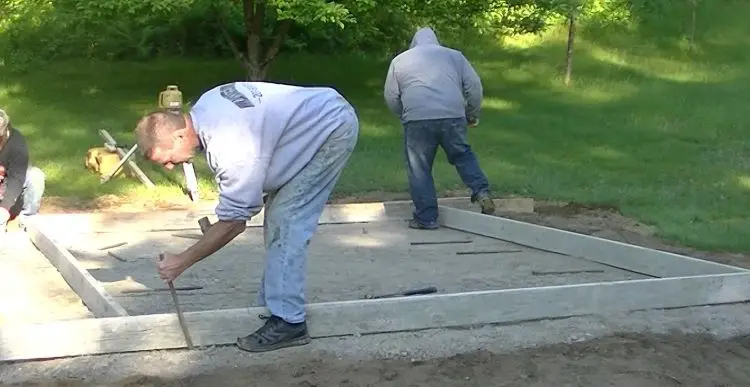
Use wooden stakes (or metal pins like me) to secure the forms in place.
I like to stake each corner, about 8 - 12 inches from the corner, on both sides.
After my 4 corners are staked, I hammer in a stake about every 4' on all the sides.
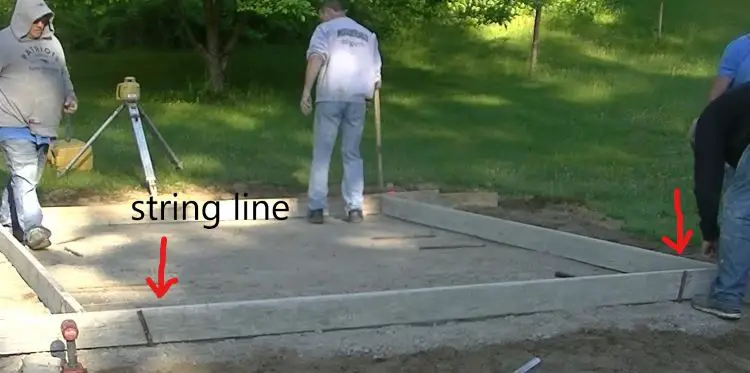
To make sure the forms are straight, I use a string line on top of the forms to check them as I stake the forms in place.
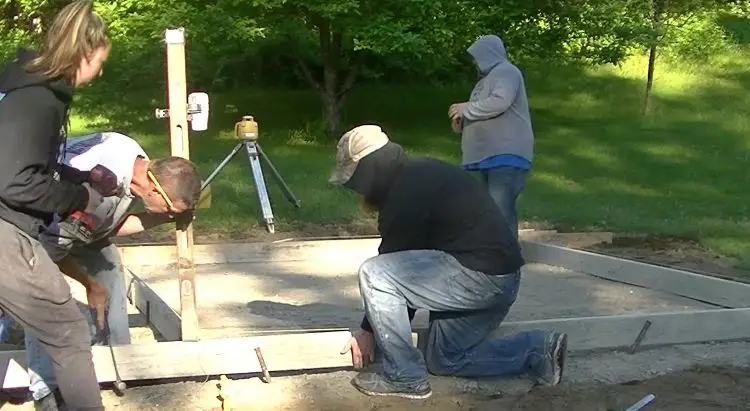
After pounding in all the stakes, I use my laser level to set all the forms perfectly level.
The receiver on my grade stick has a solid sounding "beep" when the form is at the pre-determined height. (5" above my dirt grade)
Screw the form to the stake when it's at the level you want.
Repeat for all 4 corners, then do the rest of the stakes and your forms will be level.
step 5. add the reinforcement
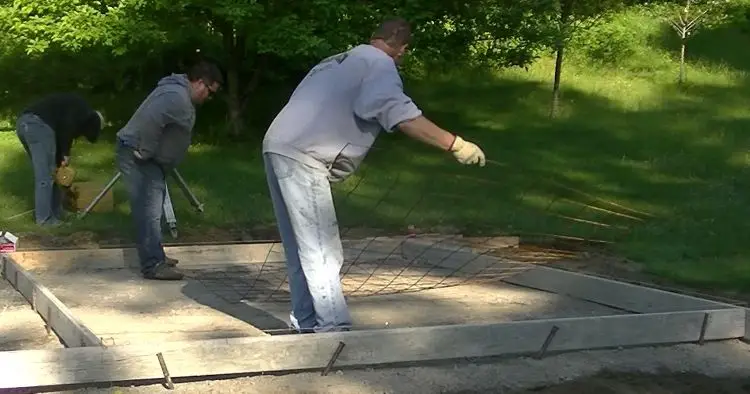
It's time to install the reinforcement, I'm using wire mesh for this slab. The best way to cut wire mesh is with a pair of bolt cutters.
I buy the flat sheets of mesh, they measure 5' x 10'. Some local lumber companies stock the flat wire. If not, they usually have the rolls of mesh (5' x 150' get these at HD and Lowe's also)
Another good reinforcement to use for concrete slabs is 3/8 (#3) rebar or 1/2" (#4) rebar. Rebar comes in 10' or 20' lengths and you cut it to the length you need.
Install rebar in 2' or 3' grids and tie it together using zip ties or a wire twister tool and wire ties.
If you use rebar and have to cut it, you can rent a rebar cutter at HD or a local tool rental store. Or you can buy a good rebar cutter / bender on Amazon.
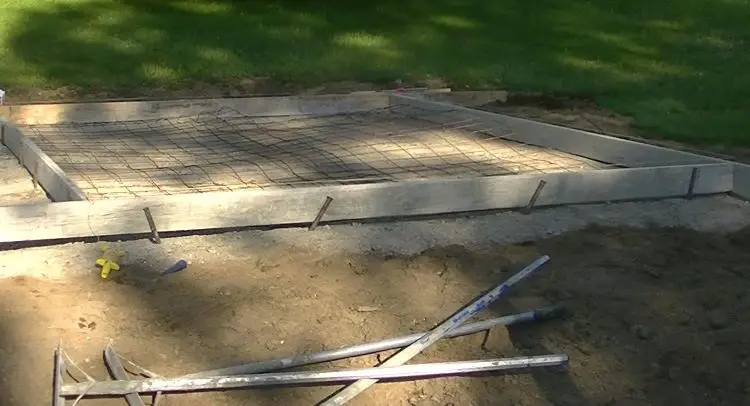
After the wire mesh goes in, you're ready to pour the concrete. If you're using ready-mix concrete, choose a nice, dry day and call your local concrete supplier to schedule the pour.
Most likely you'll have to give them about a weeks notice so don't wait till the last minute to call.
If you're using bags of concrete, use my concrete yardage calculator to see how many bags you'll need.
Learn how to mix concrete by hand here.
step 6. how to pour the concrete
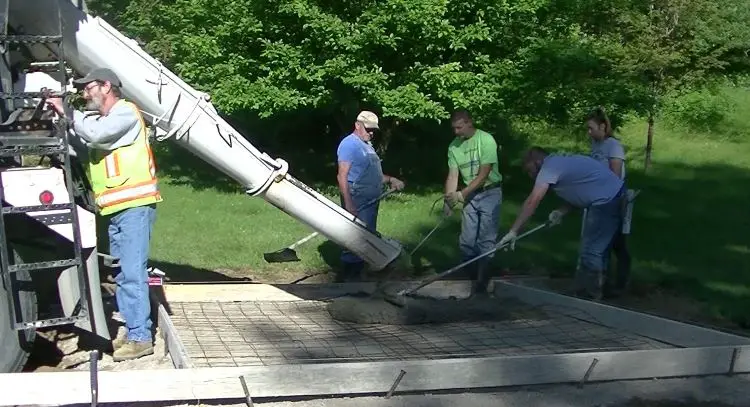
When the concrete arrives, ask the mixer driver for for a 6 inch slump. Slump is how dry or wet the concrete is mixed. A 6 slump is a good workable mix to pour with.
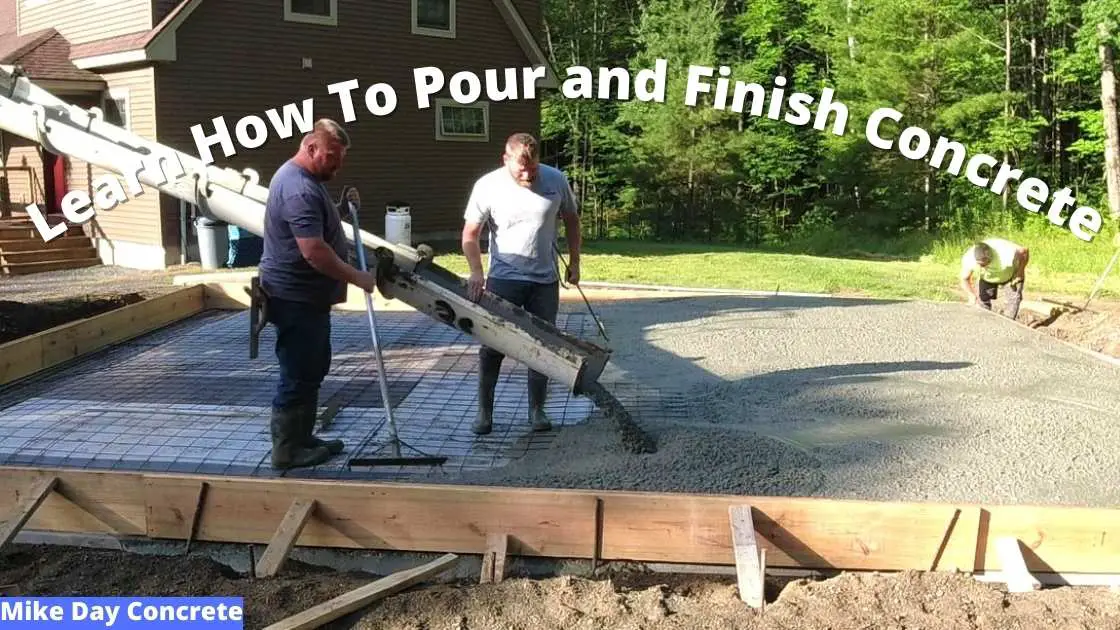
Start pulling the concrete around and filling in the forms. Pull up the wire mesh or rebar into the concrete as you pour. (or you can put small pieces of brick under it to hold it up)
Pour out as much as you're comfortable with (maybe about half on something like this if you're a beginner) before you screed it level.
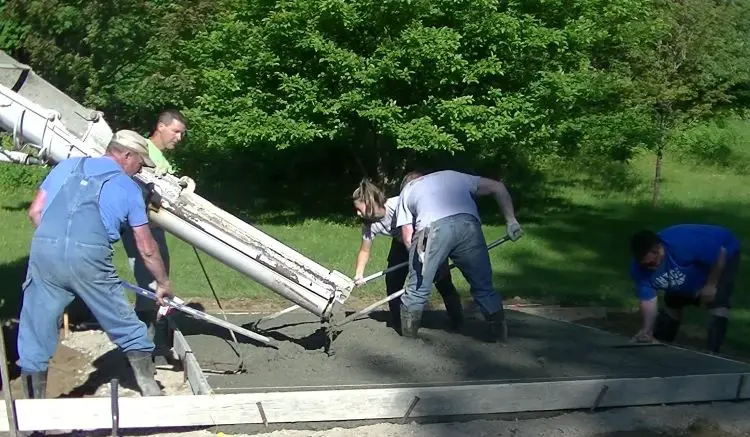
If you're mixing bagged concrete for your slab, it's the same process. Just slower.
Mix enough concrete until you have enough of the forms filled to screed the concrete.
I like to use ready mix myself. It's just faster and more convenient for me since we do multiple pours like this in a day. Either way is good. Ready mix will be more expensive on a smaller slab vs bag mix.
See how many bags of concrete come on a pallet and what they cost.
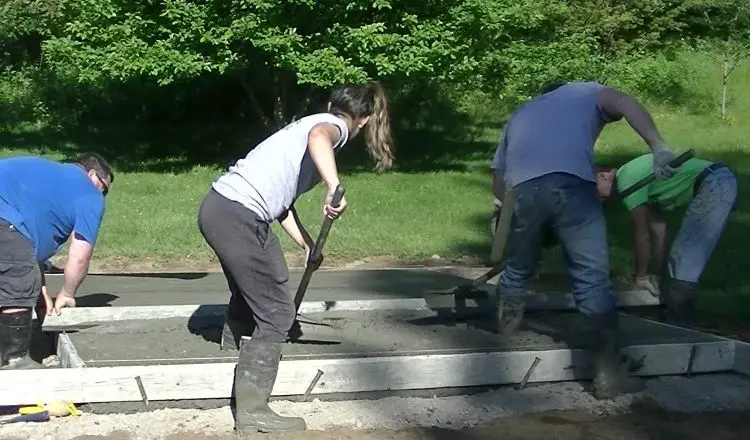
Screed the concrete level using a magnesium screed board like us or a straight 2 x 4. Use short pulling strokes and tip the screed slightly on the back edge.
Put pressure down on the screed as you pull it to make sure it rides on top of the forms. Let your helpers push concrete (to fill low spots) and pull concrete back (if it's high) as you screed.
The concrete rakes (kumalongs) we use make moving the concrete around a lot easier.
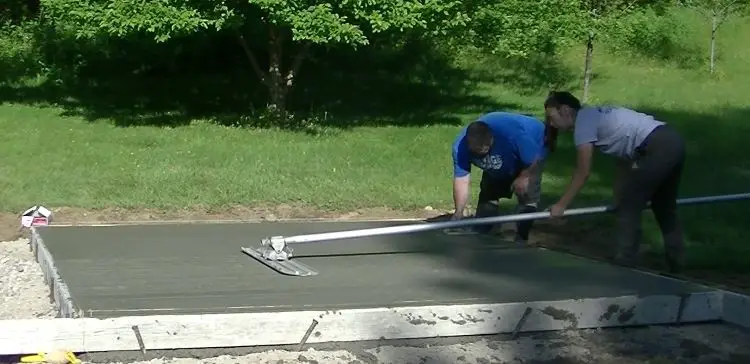
After you screed the concrete, use a bull float to smooth the surface.
A bull float pushes down the aggregate on the surface and brings up some cement paste (creme).
Tip up the front edge and slowly push it from one side to the other. When you reach the opposite side, stop, tip up the back edge and slowly pull it back to you.
It might take multiple passes in the same spot to get it nice and smooth (usually 1 - 3 times).
After you've done the entire slab this way, you're almost done with the pour.
step 7. installing anchor bolts in concrete (optional)
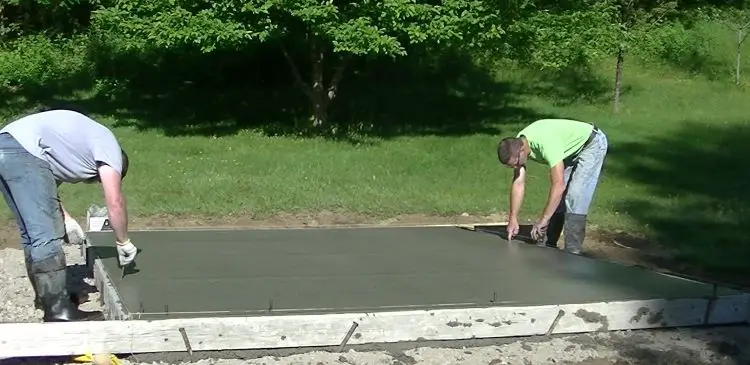
If you're using anchor bolts, now is the time to put them in the concrete. Measure out where you want them and make a mark in the concrete.
Push the anchor bolt into the concrete to the desired level you want. I usually leave about 2 inches sticking up out of the concrete.
PRO TIP: Once you push it into the concrete a few inches, slightly jiggle it up and down to consolidate the concrete around the bolt as you set it to your finished level.
Now you're done pouring the concrete.
Learn how to pour and finish concrete in my private training academy The Concrete Underground.
watch and i'll show you how to pour a concrete slab
If you're thinking of doing a broom finish, smooth trowel finish, or a textured finish on the concrete, I can show you how to finish the concrete HERE.
Another very important step is to "cure" the concrete. Click on CONCRETE SEALER to learn about this.
You can remove the forms the next day.
Return from How To Pour Concrete to Concrete Slab
Return from How To Pour Concrete To Everything About Concrete Home Page
