GARAGE FLOOR REPAIR
Garage floor repair usually involves fixing cracks or patching pitted and scaled areas on the surface.
With the right materials and tools, fixing a crack in your garage floor is something you can do yourself. In the video below, I'll show you how we repair garage floors that have a crack in them.
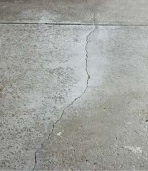 Cracked garage floor |
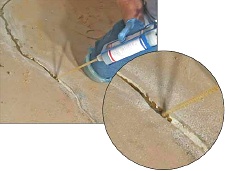 Injecting repair material |
GARAGE FLOORS CRACK FOR MANY REASONS:
- The sub-base wasn't properly compacted and the concrete settled in one area causing the floor to sink and crack.
- The garage isn't heated in the winter and the dirt under the concrete freezes causing it to expand and lift, or heave, the concrete. This upward pressure will make the concrete crack.
- Newly poured concrete shrinks when it dries. If no expansion joints are cut into the concrete floor then shrinkage cracks will appear at some point in the future. These are quite common.
There are some other reasons like, the concrete was poured too wet, or too much calcium chloride was added to the mix and it dried too fast, or the concrete was improperly cured. All these will lead to shrinkage cracking at some point.
If you determine the cracks are due to settling or heaving, then that is a sub-base issue and the concrete may have to be removed to correct that issue. Repairing these cracks will only be temporary if the concrete continues to move up or down.
If you think the floor is done moving you can repair those cracks and the shrinkage cracks with a material you inject into the crack and add silica sand for a filler. This will weld the crack together creating an excellent garage floor repair.
STEP BY STEP GARAGE FLOOR REPAIR:
STEP 1. Clean out the crack with a vacuum, remove any loose cement or aggregates.
STEP 2. Inject the crack weld resin into the crack to wet it, it will soon get tacky.
STEP 3. Push the dry silica sand into the crack to fill it.
STEP 4. Thoroughly saturate the sand with the crack weld resin and fill it to the surface.
STEP 5. In 10 - 15 minutes scrape the surface level with a putty knife.
STEP 6. Sand the surface smooth or lightly grind it with a hand grinder for a neat appearance.
Hairline cracks can be done without the sand. Wide cracks can first be filled partially with the sand then start with step 2.
This crack weld material sets up very quickly, only do 10 - 15 feet at one time.
Radonseal makes a Do It Yourself Kit that has all the repair materials included. They also have a couple of great videos that visually explain how to use this crack weld material.
DIY GARAGE FLOOR REPAIR VIDEO:
After fixing your garage floor cracks, check out some garage flooring ideas to make it look like new again.
For information on other garage floor related topics click on the links below.
HOW TO PAINT GARAGE FLOOR COATINGS
EPOXY GARAGE FLOOR COATING PREPARATION
GARAGE FLOOR PAINT BEST VS WORST
Return from Garage Floor Repair to Garage Floor
Return from Garage Floor Repair to Everything About Concrete Home Page
